
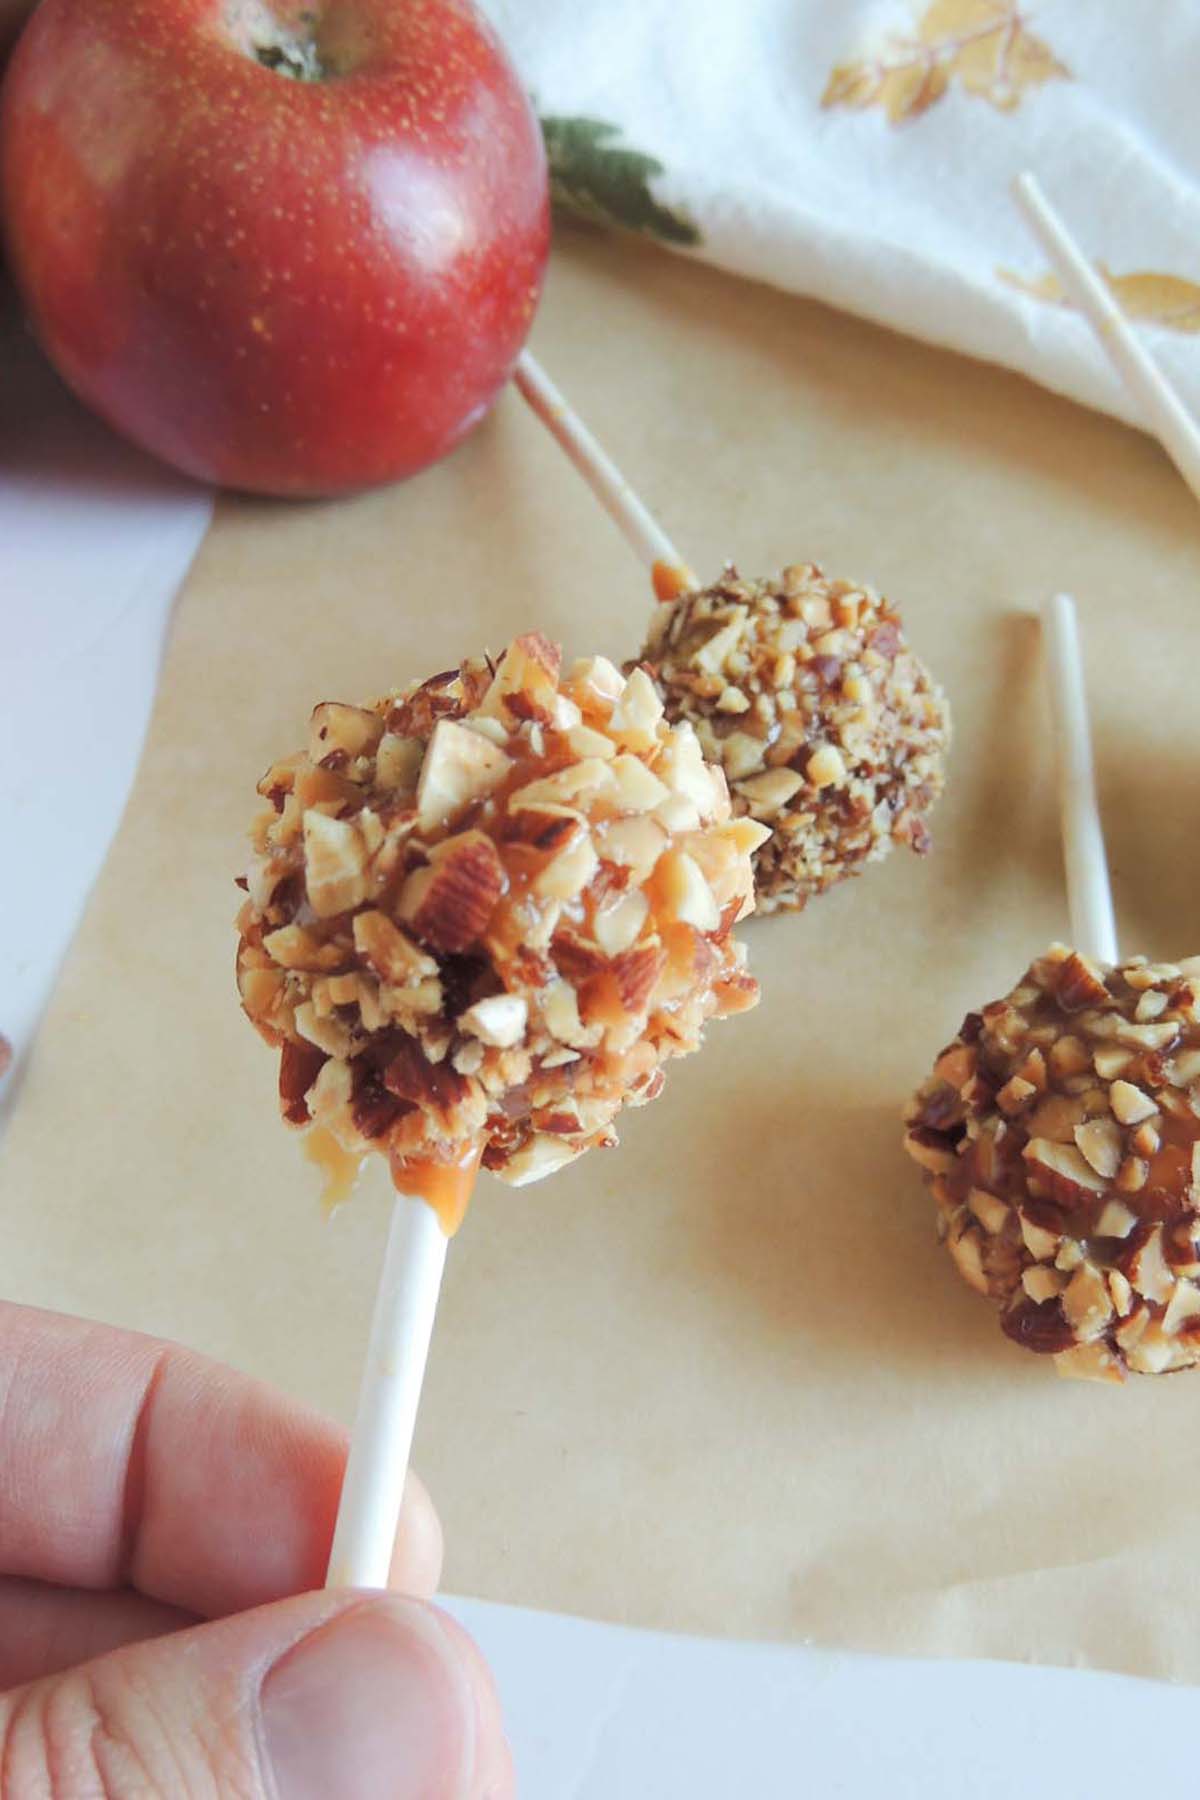
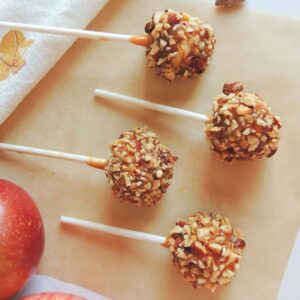
These homemade Caramel Apple Bites are made with just 4 simple ingredients. The combination of crisp, juicy apples and sweet, chewy caramel is a fun way to make the perfect fall treat. These adorable caramel apples are easy to eat and a fun treat for the whole family to make.
Try my Cinnamon Rolls With Apple Pie Filling and Chocolate Chip Applesauce Cookies for more recipes perfect for fall.

Jump to:
Caramel apples are the perfect snack! Eating full-sized caramel apples can be so big and messy, and sometimes hard to finish. These caramel apple bites are a great choice!
It's a great way to use fresh fall apples for an amazing seasonal treat.

Best Type Of Apples To Use
You can use your favorite variety of apples. The best apples are tart granny smith apples, but you can use and crisp apples like pink lady or a honeycrisp apple.
Favorite Toppings
Topping are optional, but fun! These are some of my favorites:
- Chocolate Drizzle
- Crushed Butterfingers
- Shredded Coconut
- Crushed Graham Crackers
- Mini Marshmallows
- Chopped Pistachios
- Crushed Oreos
- Mini M&Ms
- Crushed Pretzels
- Sprinkles
- Chopped Pecans
- Mini Chocolate Chips
- Peanut Butter Drizzle
- Rolo candy
Why You’ll Love This Recipe
Mini candy apples is the easiest recipe! They’re bite-sized, crunchy and sweet and are a great party dish!
They’re easy to handle and easy to prepare. Add this sweet treat to your favorite fall treats!
Ingredients You Need
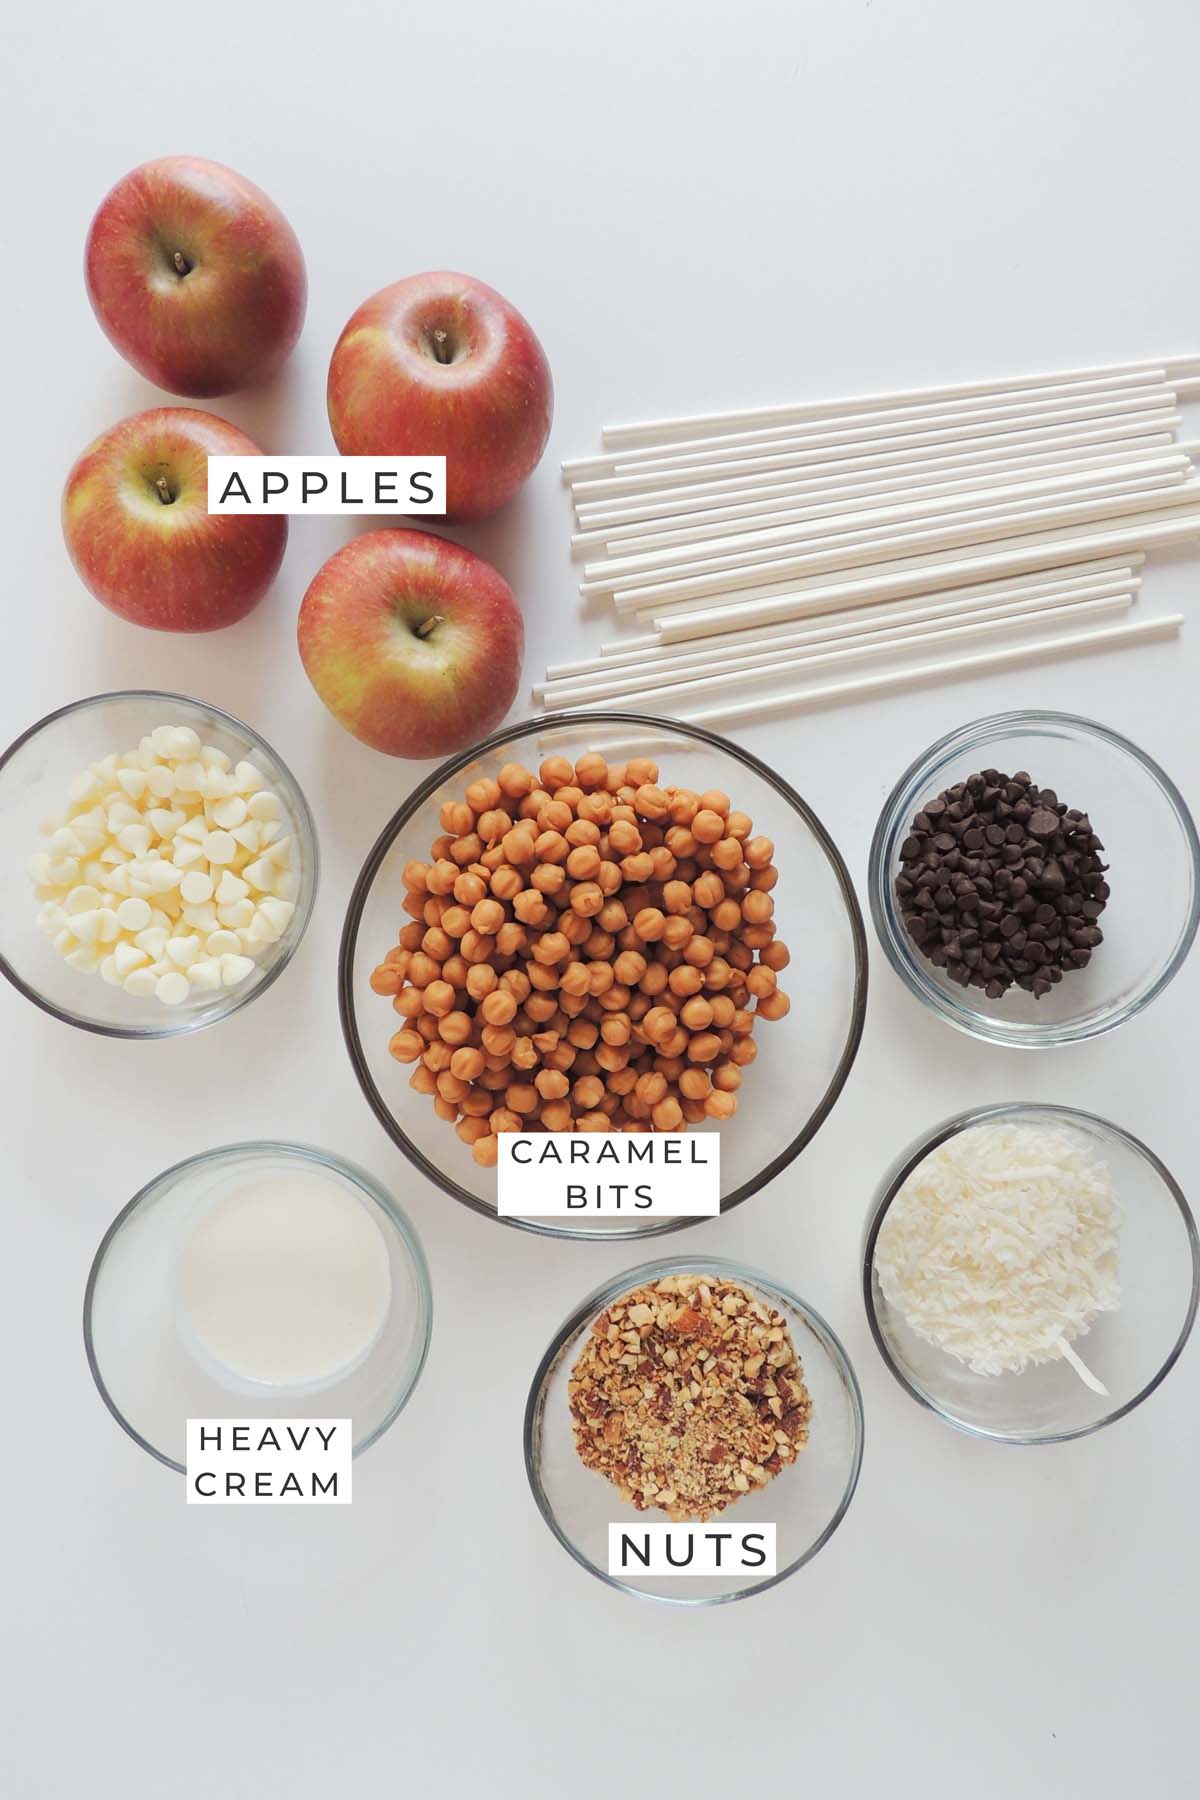
- Apples: Use your favorite apples! Tart apples are best because it balances the sweetness of the caramel.
- Caramel bits: You can also use individually wrapped caramels, just make sure they are fresh. If they are stale or old the caramel will be extremely tough after it is melted.
- Heavy cream: Helps to make the caramel the perfect consistency.
- Nuts: This is an optional step, but toppings are fun.
Step By Step Photos
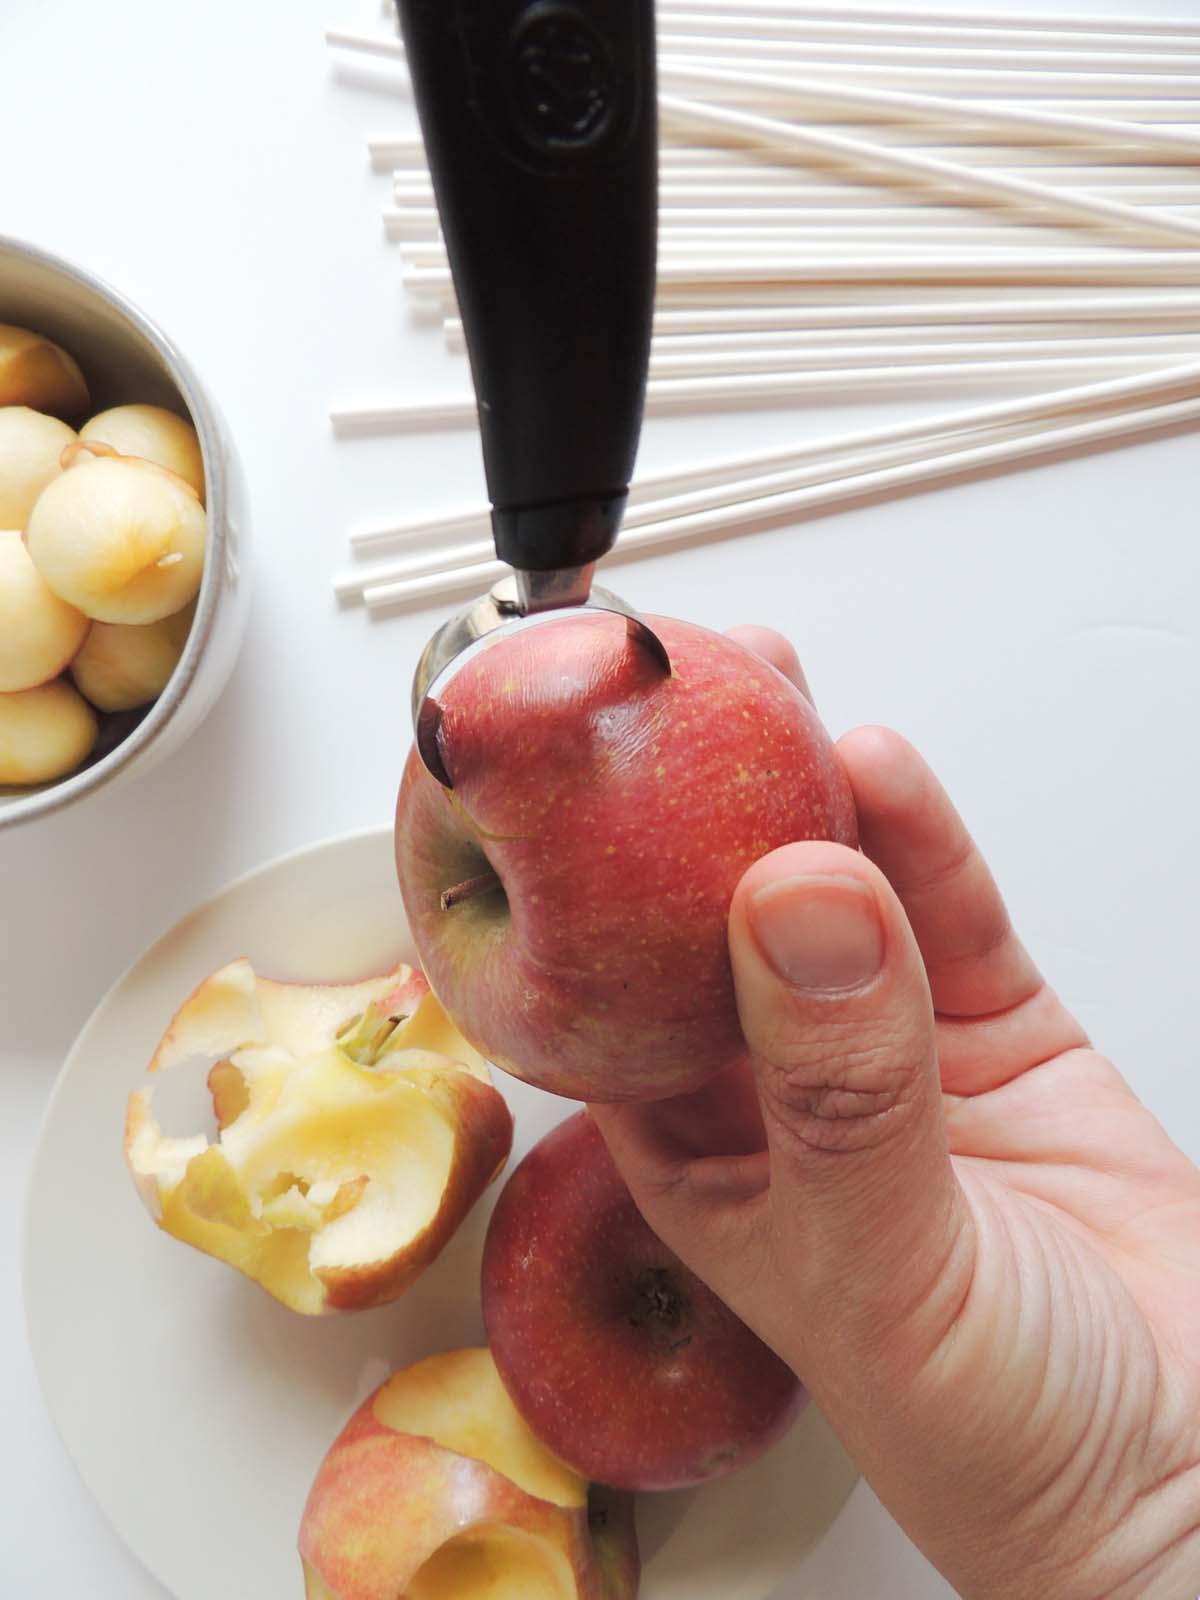
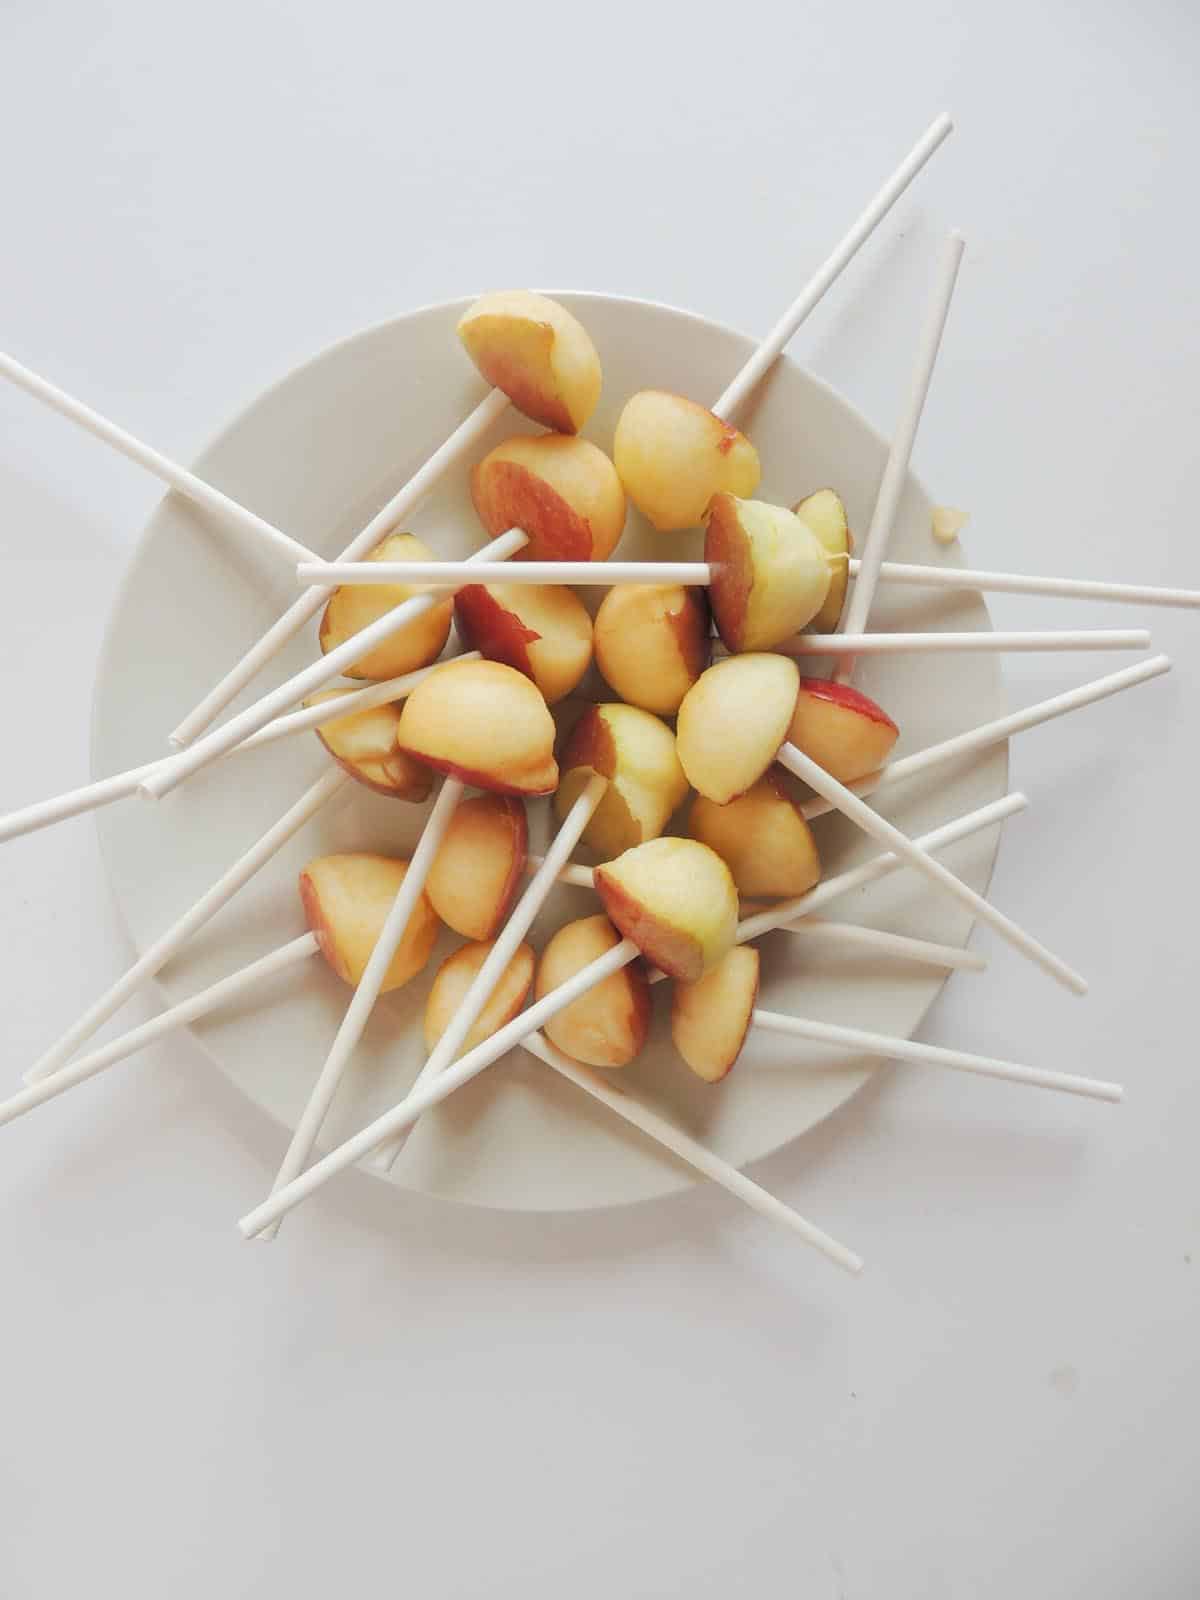
Using a melon baller...

Scoop rounded balls from all the apples.

Stick each apple ball...
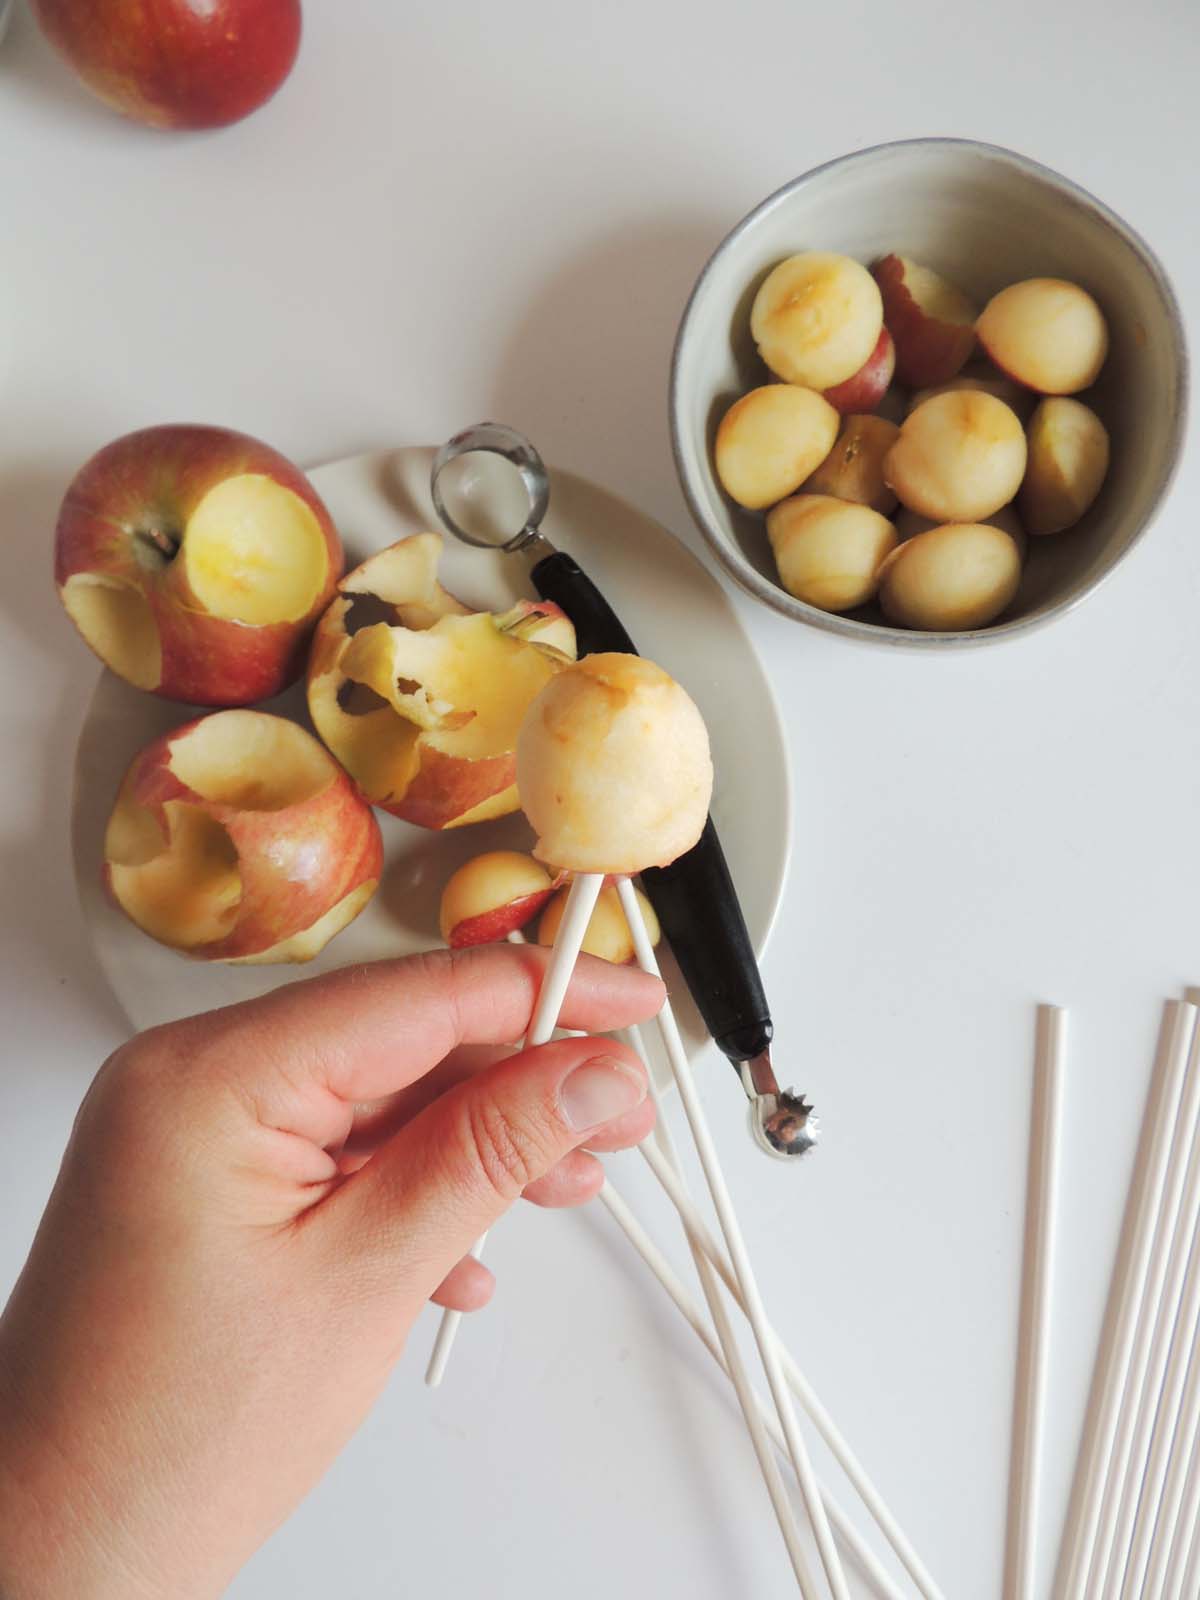
On a sucker stick.
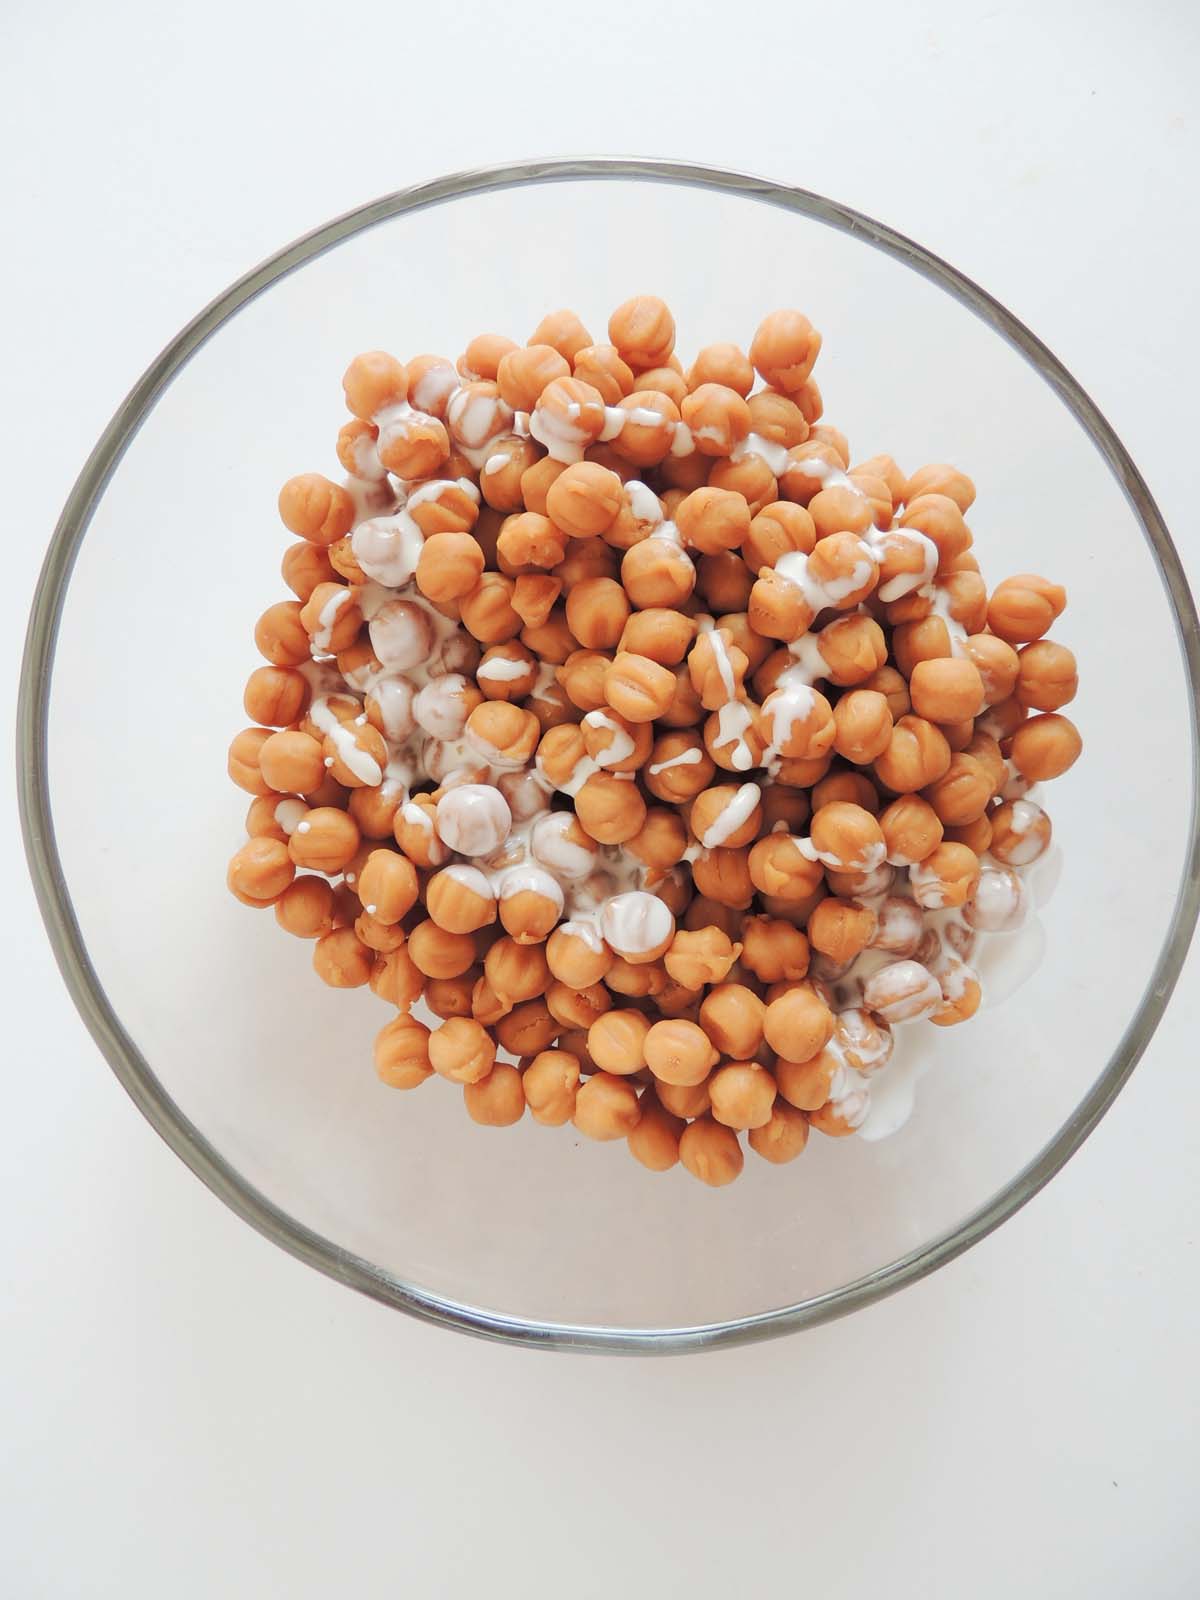
Melt caramel bits with heavy cream.
Apples need to be very dry.
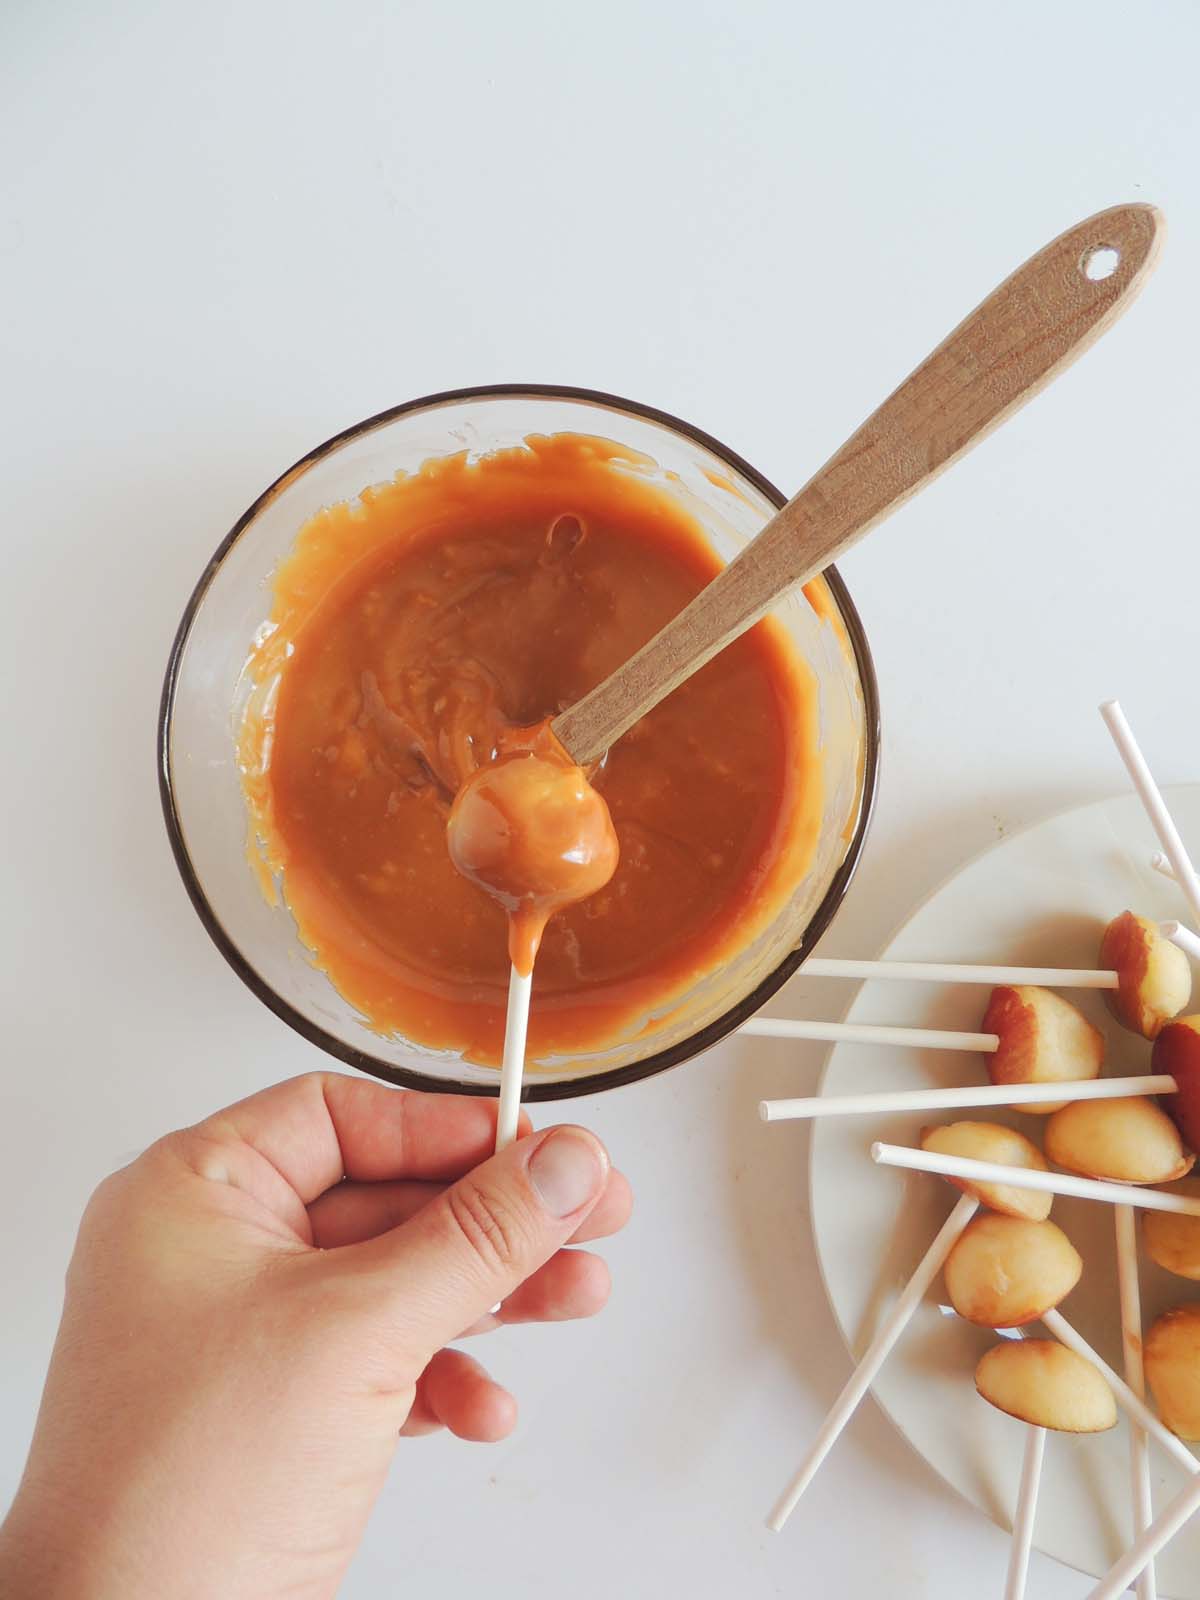
Dip each apple bite in melted caramel.
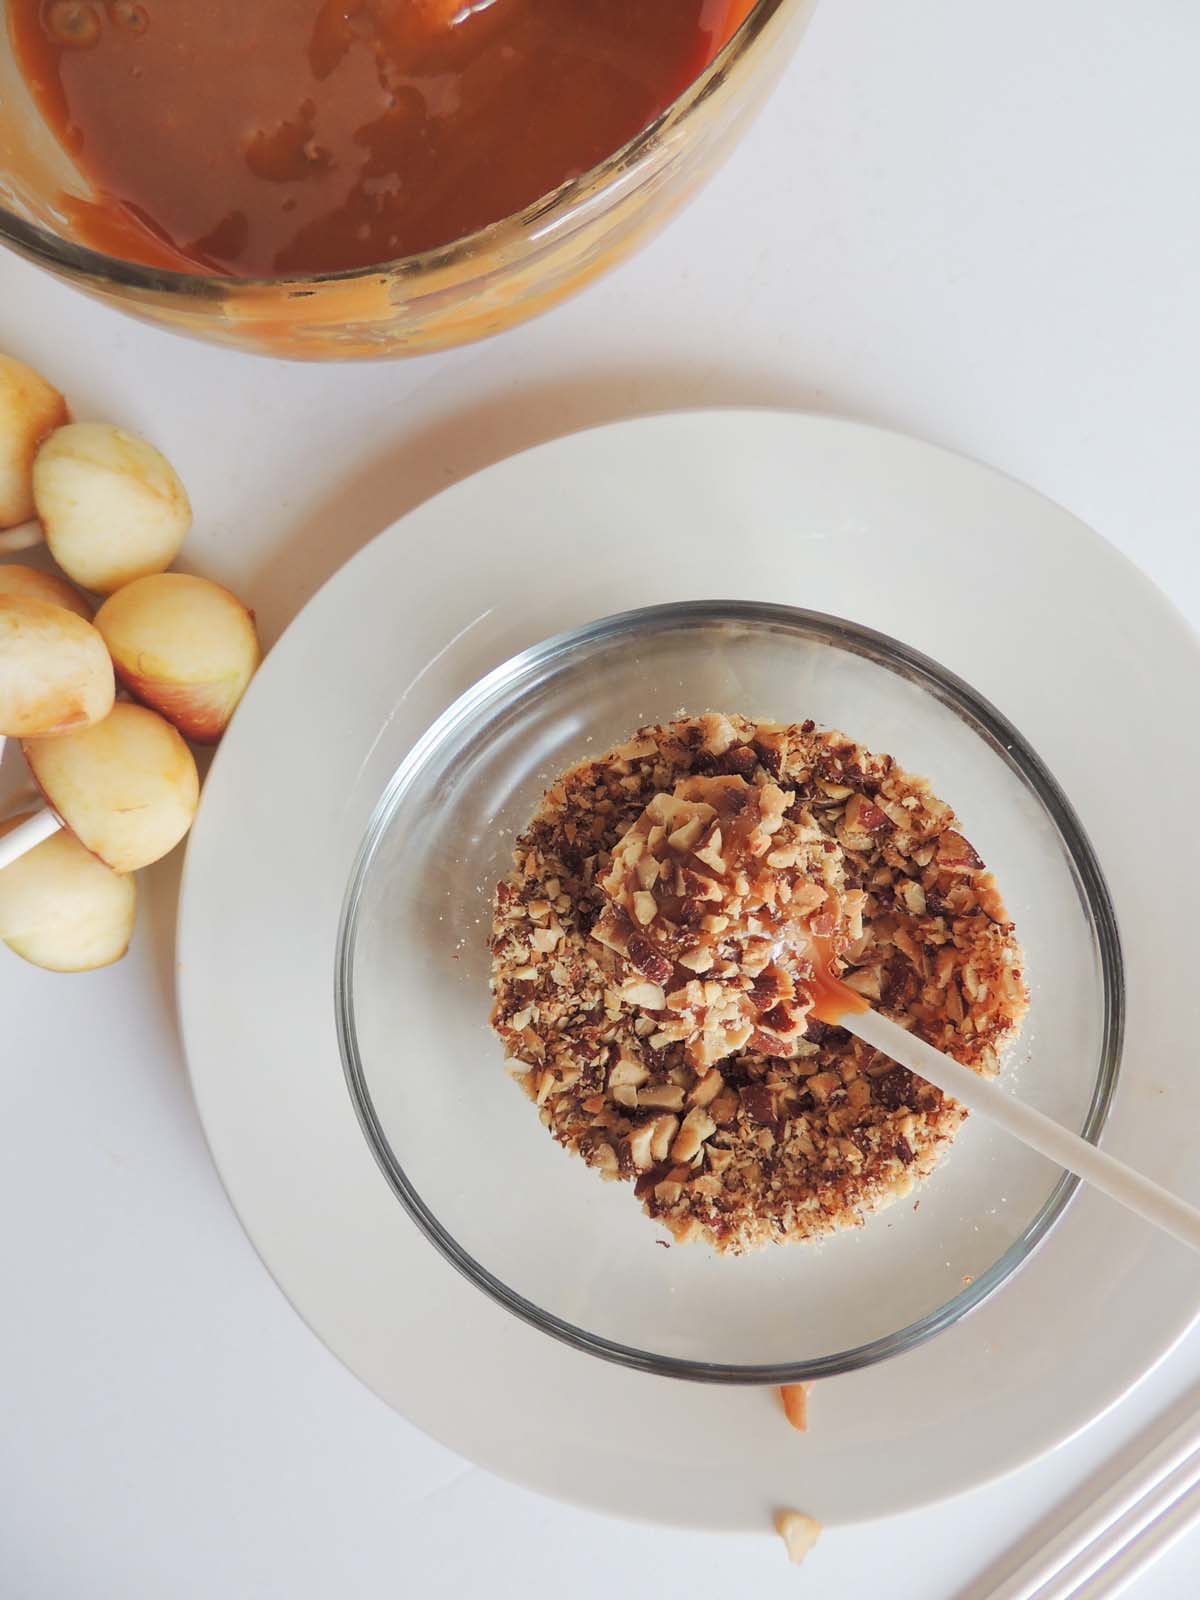
Then immediately in the nuts.
How To Make Mini Caramel Apples
Step 1. Set up: Line a baking sheet with parchment paper and place the nuts in a small bowl.
Step 2. Shape apples: Use a melon baller to create rounded apple balls and insert sucker sticks.
Step 3. Melt caramel: Microwave caramel bits with heavy cream for 2 minutes, stirring until fully melted.
Step 4. Dry apples: Pat each apple bite dry with a paper towel to remove excess moisture.
Step 5. Dip and coat: Quickly dip each apple bite into melted caramel, then immediately into the nuts.
Step 6. Quick freeze: Place coated apple bites on the parchment-lined sheet and freeze for 10 minutes.
NOTE: You can print the FULL recipe with all ingredients & detailed instructions below!
Tips
- Lightly dust the serving plate with powdered sugar to prevent the bottom of the caramel apples from sticking to the plate.
- If you use too much heavy cream, the caramel sauce will not set up well.
- The apple bites need to be as dry as possible before dipping them into the caramel sauce.
- Add toppings quickly after the caramel or they won’t stick!
- You can also use a popsicle stick or small pretzel sticks if you don't have any sucker sticks.
Frequently Asked Questions About Caramel Apple Bites
Place the caramel apples in an airtight container or wrap them individually in plastic wrap before refrigerating. Store for up to 5-7 days.
Yes, you can freeze them. Once the caramel coating has set, transfer the bites to a freezer-safe container with parchment paper between layers to prevent sticking. They can last for up to 2 to 3 months.
More Fall Recipes You Might Enjoy


If you love this recipe, please leave a comment with a five-star rating — or simply hit the five-star button in the recipe card. Don't forget to signup for my newsletter.
Caramel Apple Bites
Ingredients
- 3 large apples
- 1 ounce bag caramel bits
- 1 tablespoon heavy cream
- Finely diced nuts
Instructions
- Line a baking sheet with parchment paper. Place nuts in a small bowls and set aside.
- Using a melon baller, scoop rounded balls from all the apples and stick each apple ball on a sucker stick.
- In a medium glass bowl, melt caramel bits with heavy cream for 2 min in the microwave. Stir, and if necessary, microwave 30 seconds at a time stirring in between until fully melted.
- Apples need to be very dry for caramel to stick. Use a paper towel to dry each apple bite before dipping it in the caramel.
- Dip each apple bite in the melted caramel, then immediately in the nuts. You will need to work quickly as caramel cools fast. You can reheat in the microwave if needed.
- Place the dipped caramel apple bites on the sheet of parchment and put in the freezer for 10 minutes to cool.
Notes
- Lightly dust the serving plate with powdered sugar to prevent the bottom of the caramel apples from sticking to the plate.
- If you use too much heavy cream, the caramel sauce will not set up well.
- The apple bites need to be as dry as possible before dipping them into the caramel sauce.
- Add toppings quickly after the caramel or they won’t stick!
- You can also use a popsicle stick or small pretzel sticks if you don't have any sucker sticks.
- Storing: Place the caramel apples in an airtight container or wrap them individually in plastic wrap before refrigerating. Store for up to 5-7 days.
- Freezing: Once the caramel coating has set, transfer the bites to a freezer-safe container with parchment paper between layers to prevent sticking. They can last for up to 2 to 3 months.
Nutrition
All nutritional information is based on third-party calculations and should be considered estimates. Actual nutritional content will vary with brands used, measuring methods, portion sizes and more.


Leave a Reply