
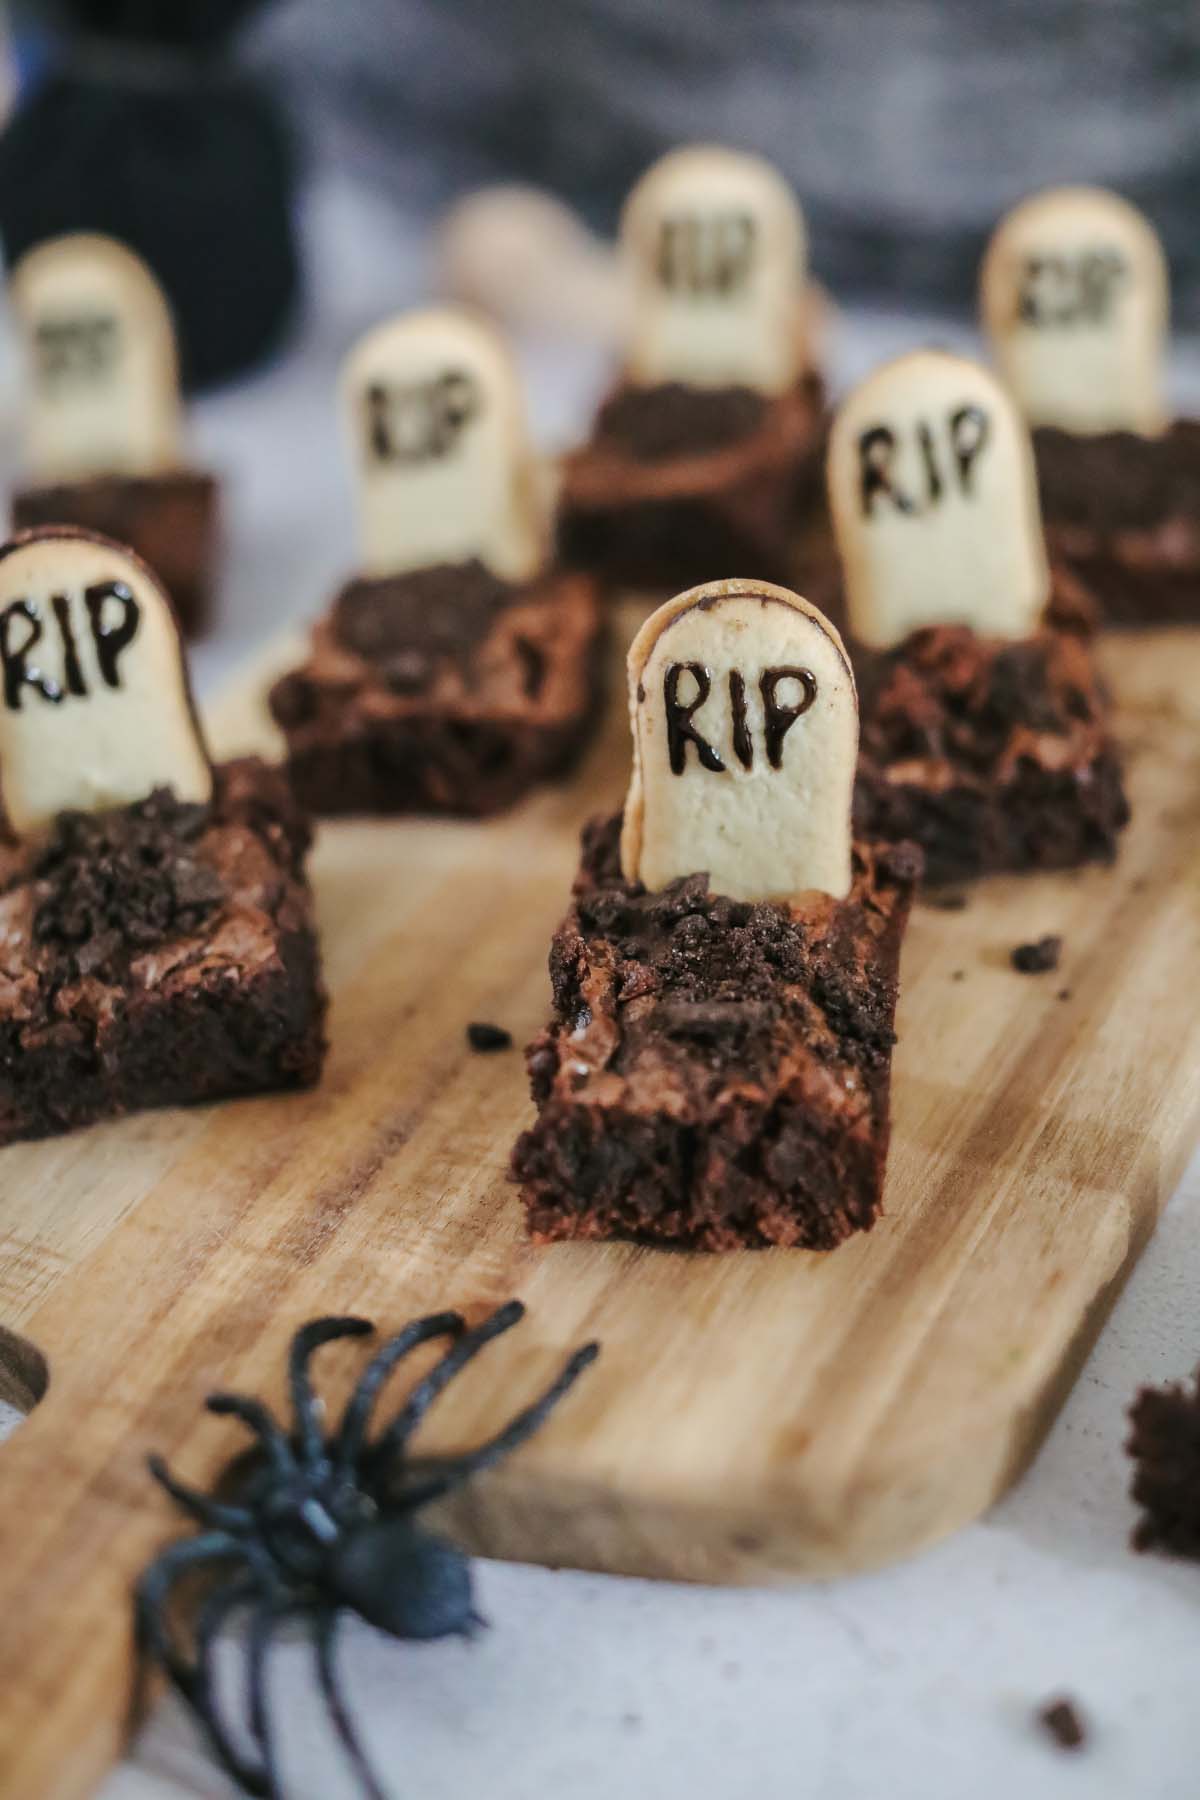
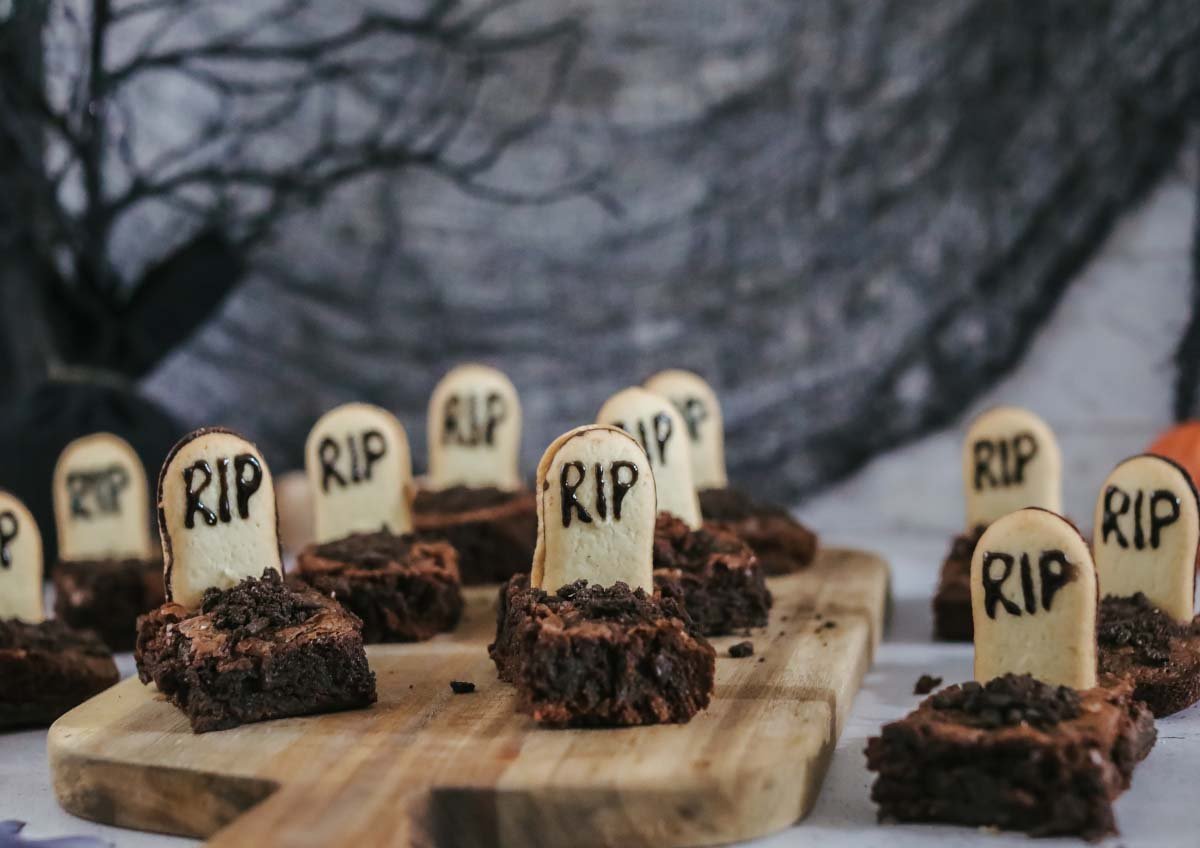
If you’re looking for the perfect spooky Halloween brownie, then these Graveyard Brownies are for you! They're a fun treat for halloween parties and are so much fun to make.
Check out my Halloween Cheesecake Brownies and my Caramel Apple Bites for more fun Halloween recipes!
Jump to:
Looking for fun halloween recipes for your next Halloween party? These adorable Halloween treats are the perfect spooky treat!
These Halloween brownies are sure to be a hit with anyone who loves spooky season! Happy Halloween!
Why You'll Love This Recipe
This fun Halloween treat is a delicious no-fuss recipe. It's made the simple way with a box mix. Add this recipe to your list of favorite Halloween recipes!
The graveyard decorations can be made ahead of time, so all you have to do is assemble the spooky brownies when you're ready to serve. Halloween baking is so much fun!
Ingredients You Need
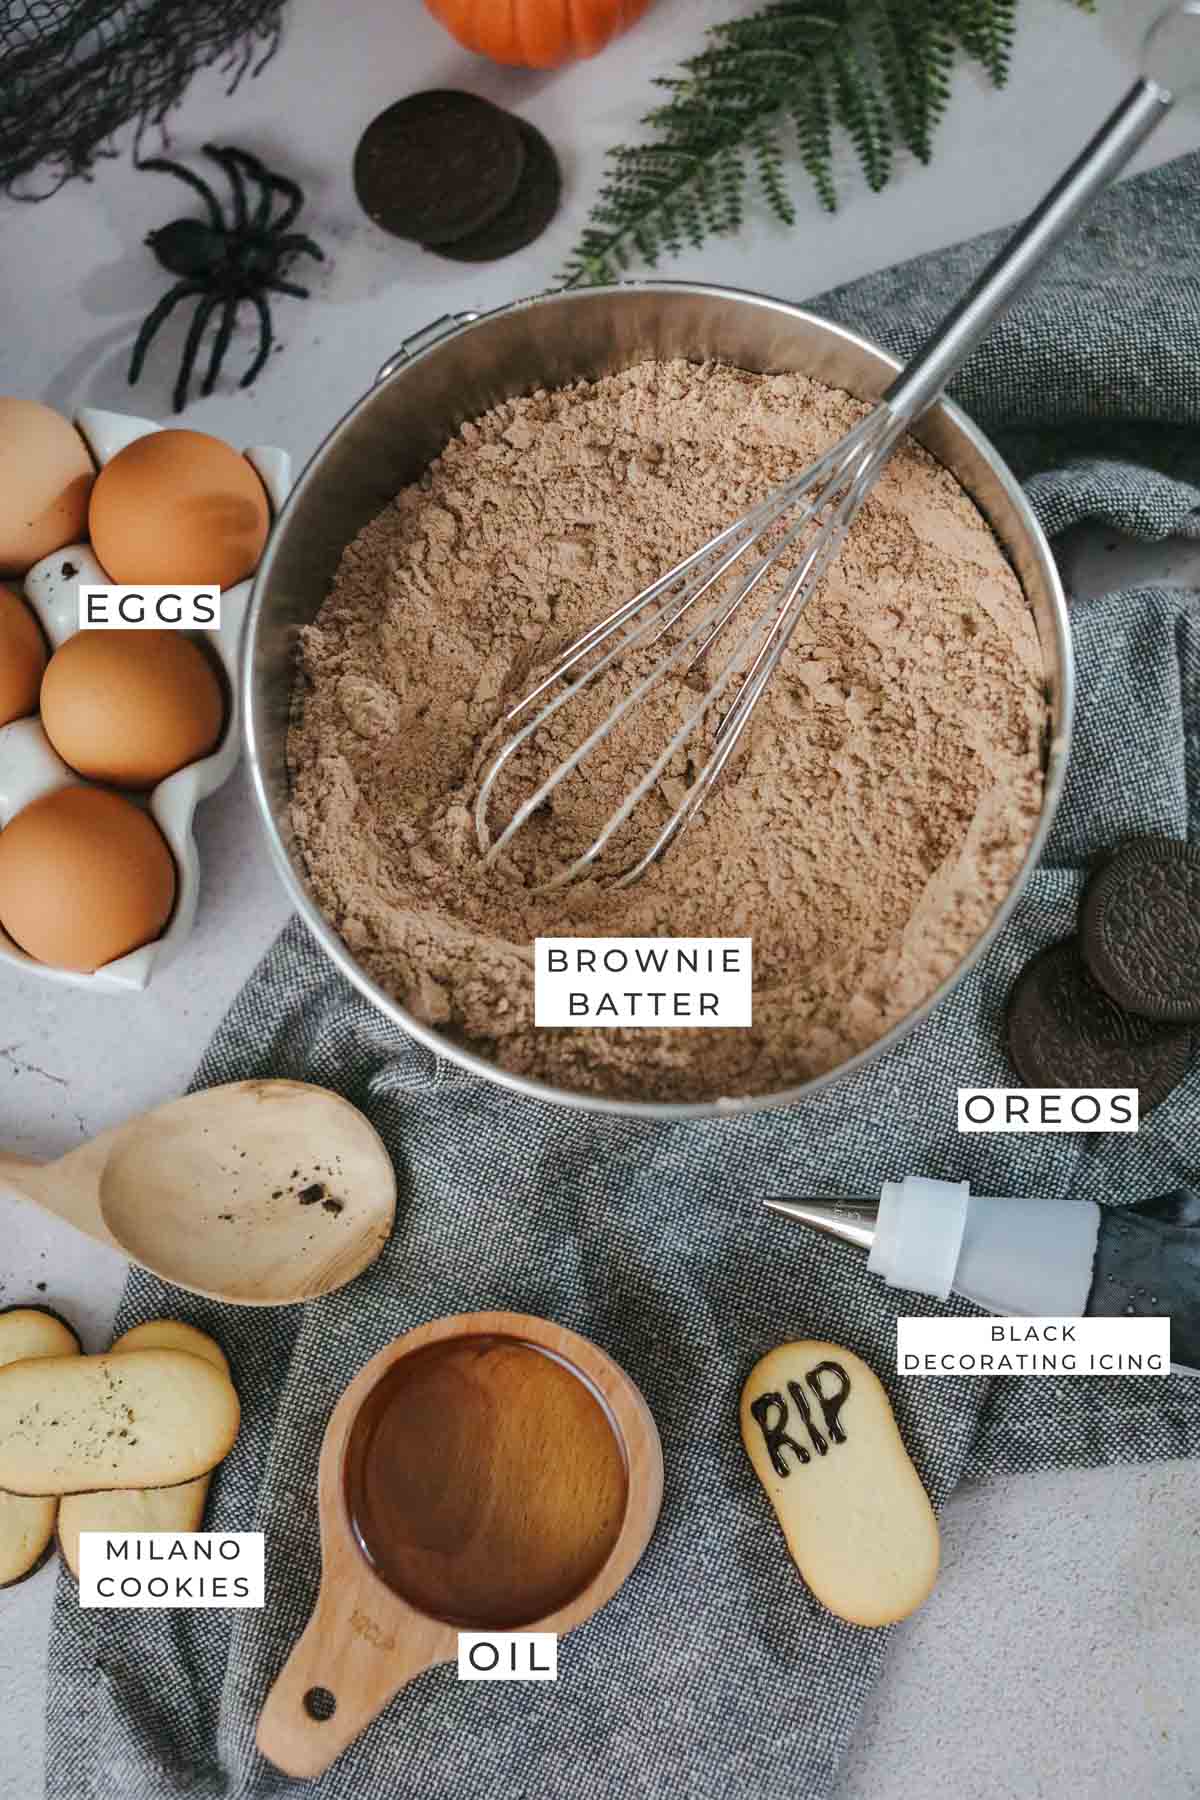
- Prepared brownie batter: You can use any box of brownie mix or your favorite brownie recipe.
- Typically needed for boxed brownies: 2 eggs, olive oil and water. Just make sure you check the bag of the box for all important ingredients.
- 12 Milano cookies: These cookies are what makes the cookie headstones.
- Black icing: You'll need the icing to help decorate the graveyard. You can also use black gel.
- 5 Oreo cookies, filling removed: These cookies will need to be crushed. They made the mounds of dirt.
Step By Step Photos
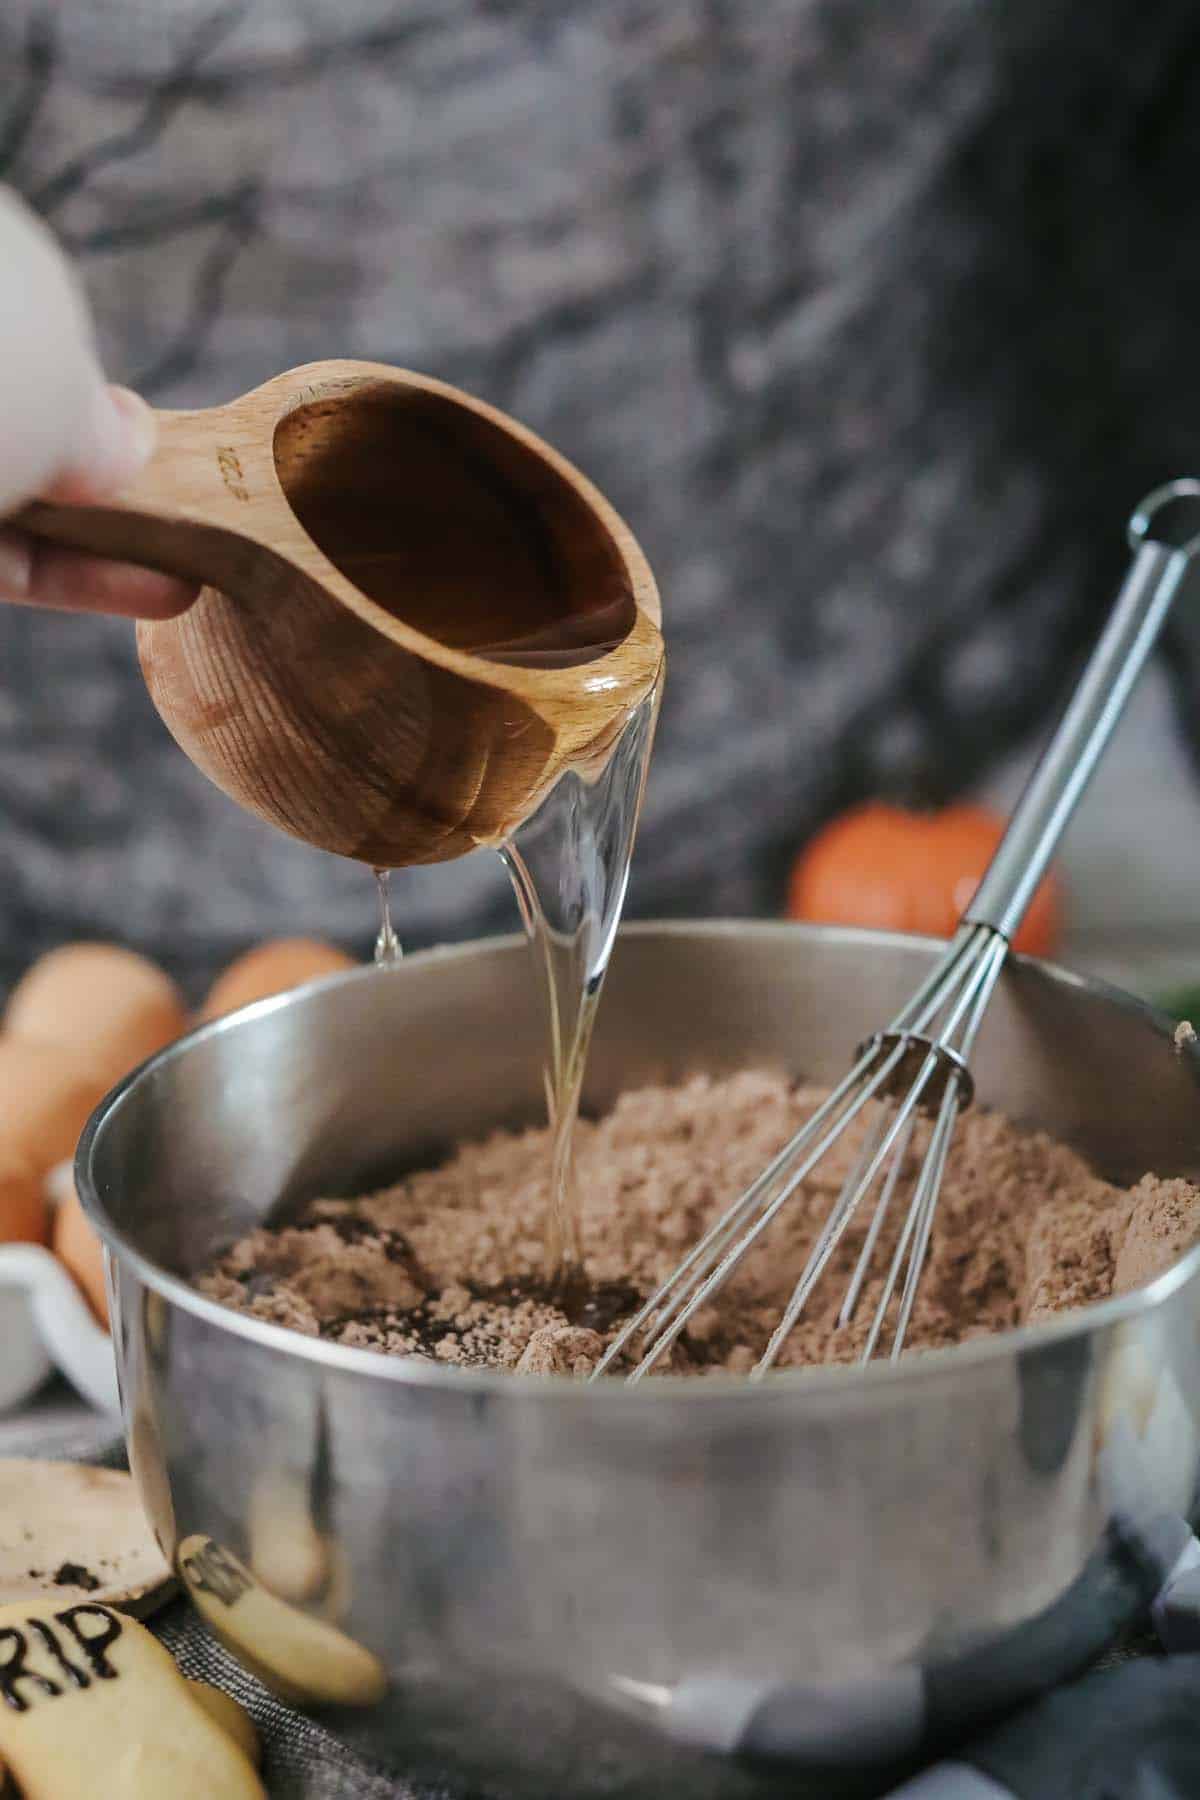
Add oil to brownie batter.
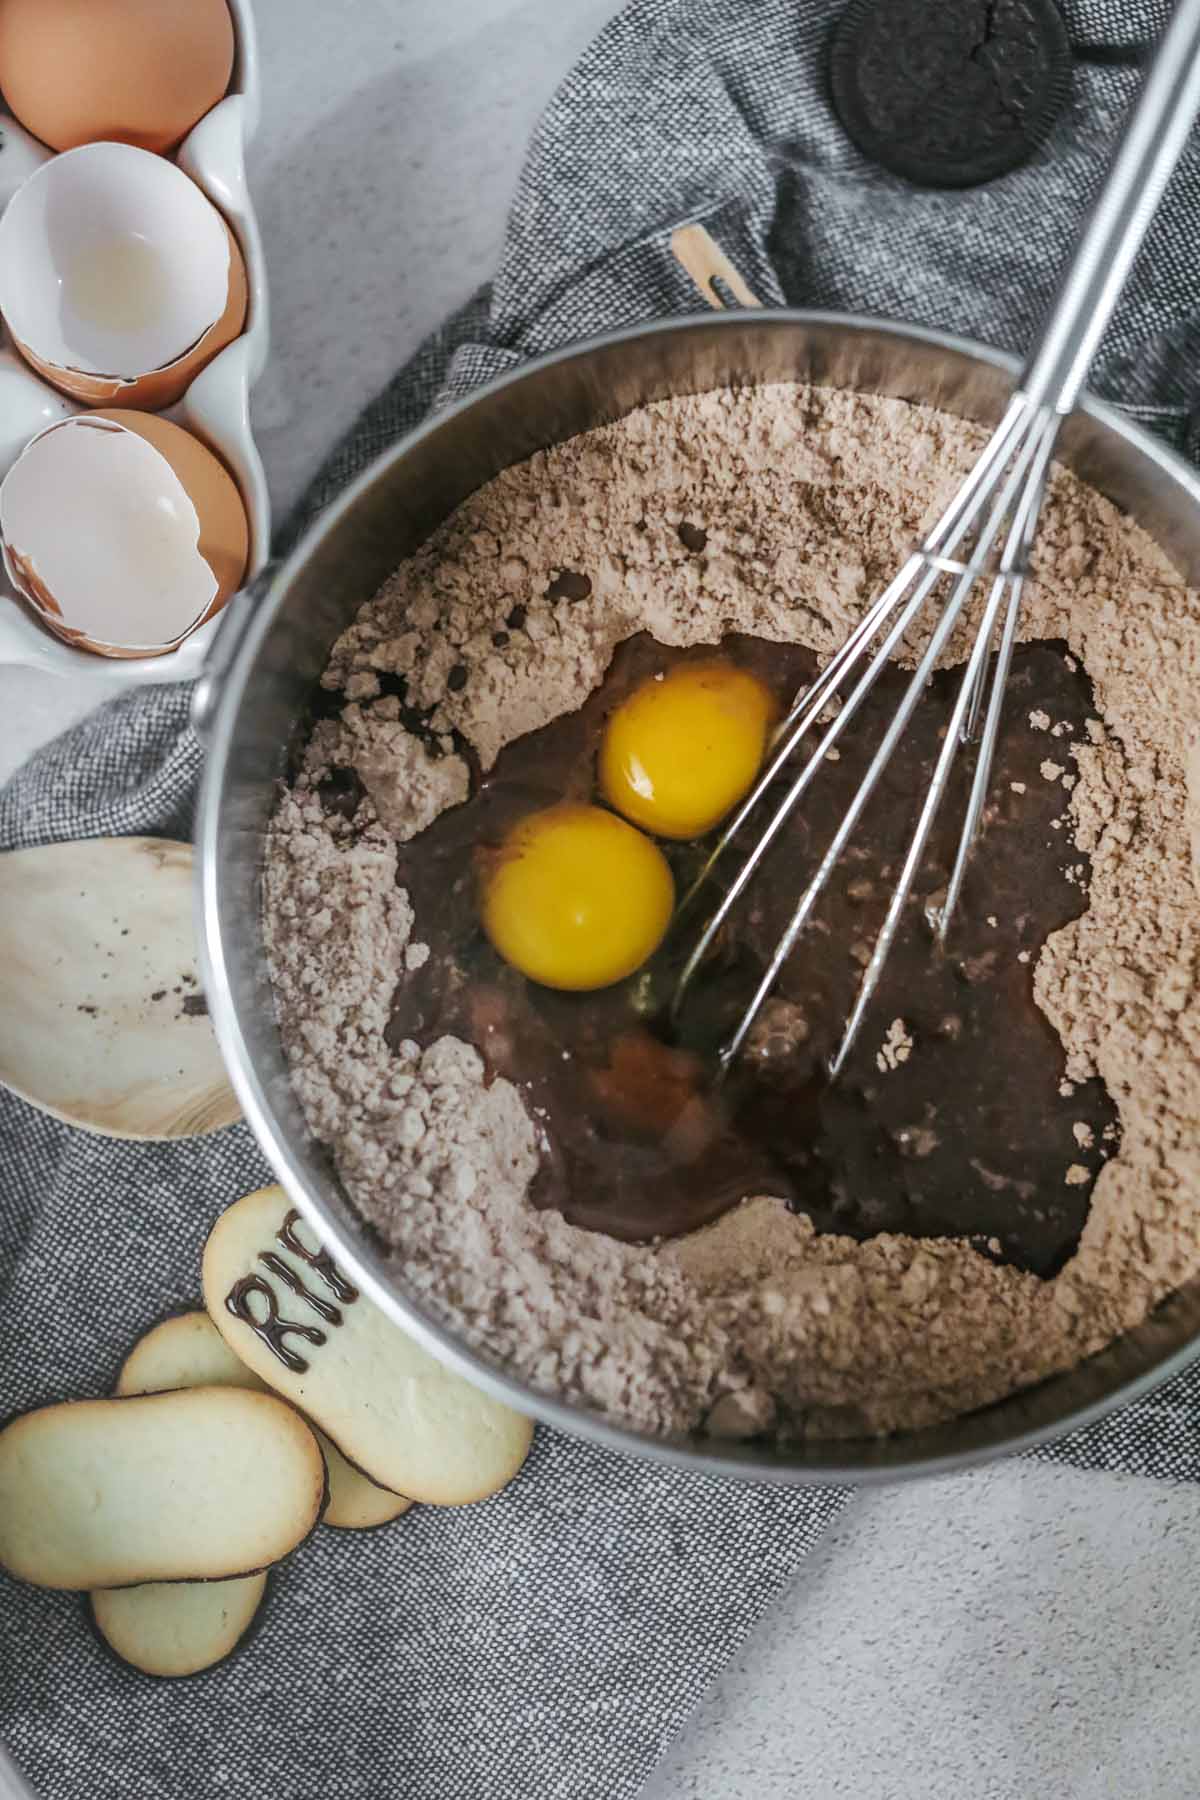
Add eggs to brownie batter.
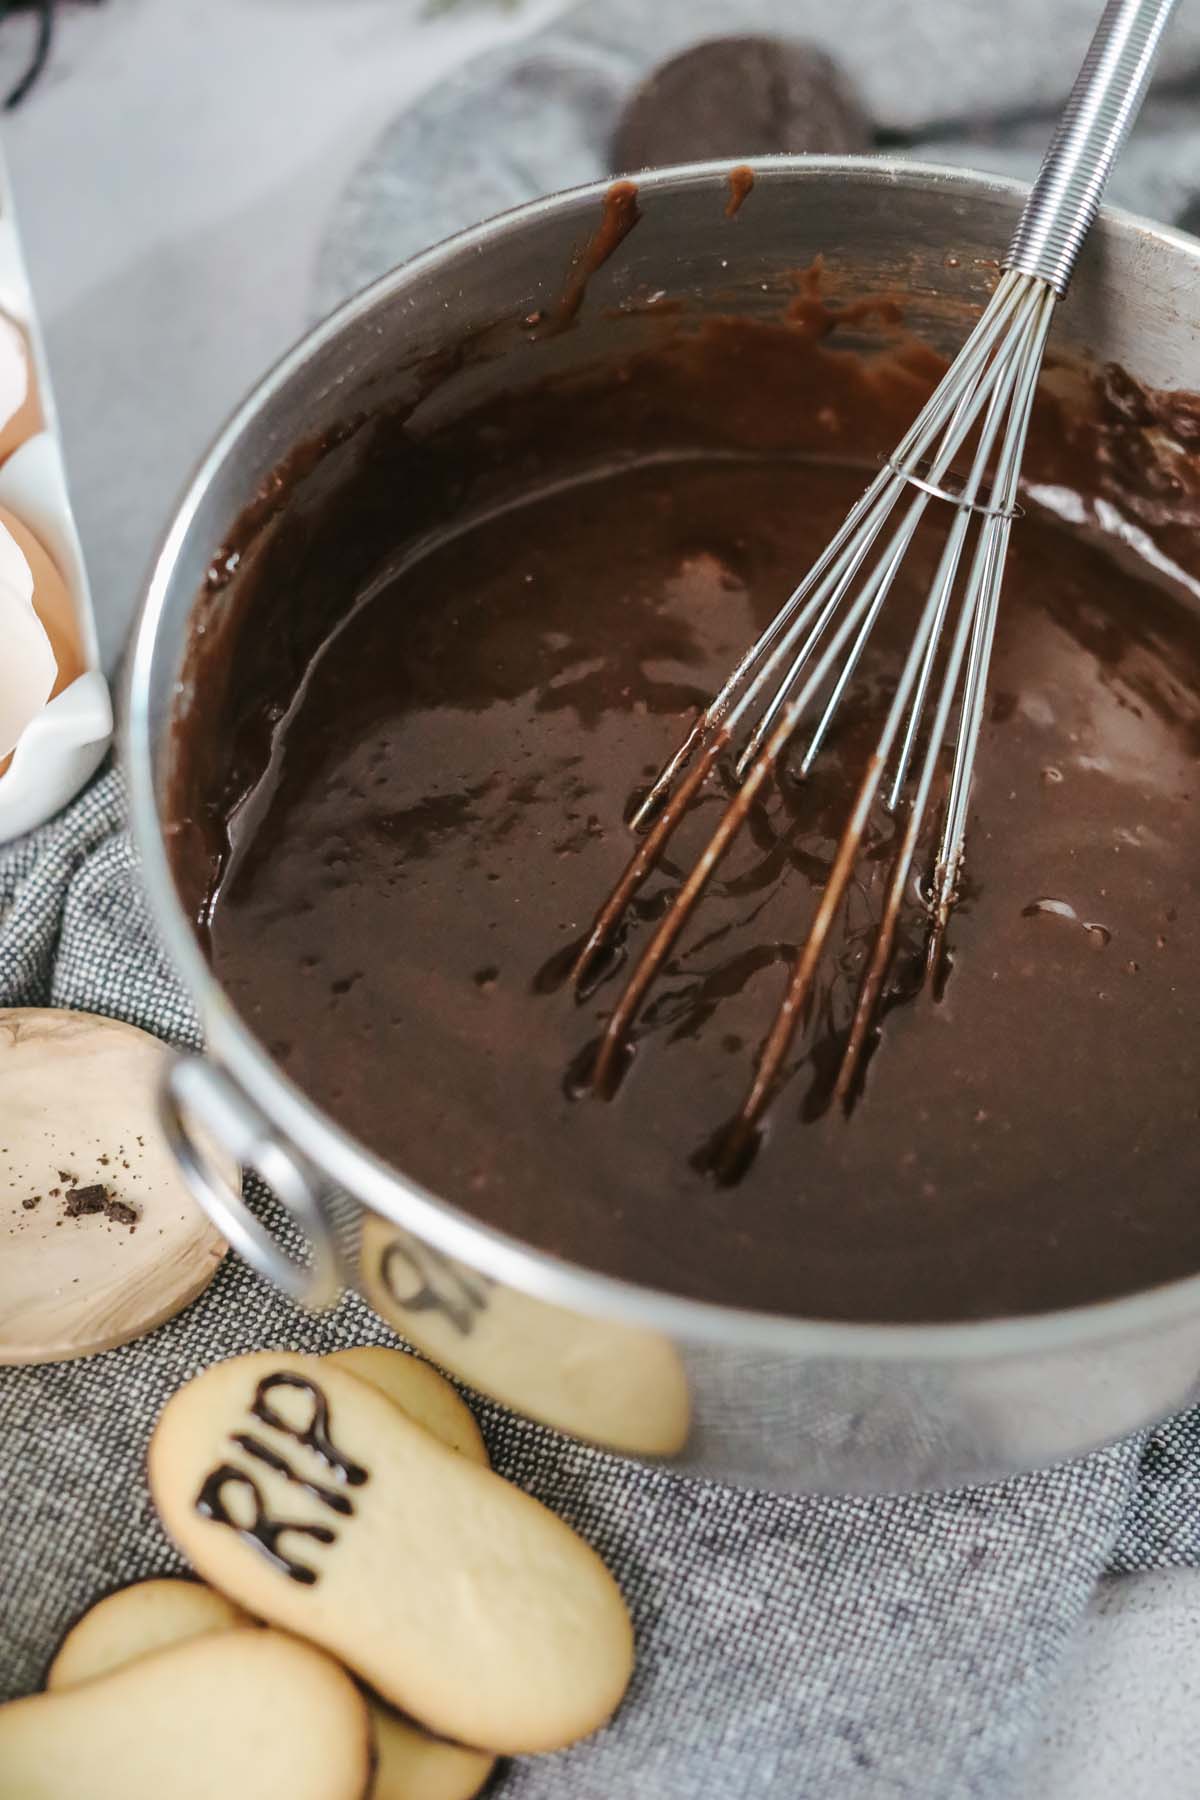
Mix the brownie batter together.
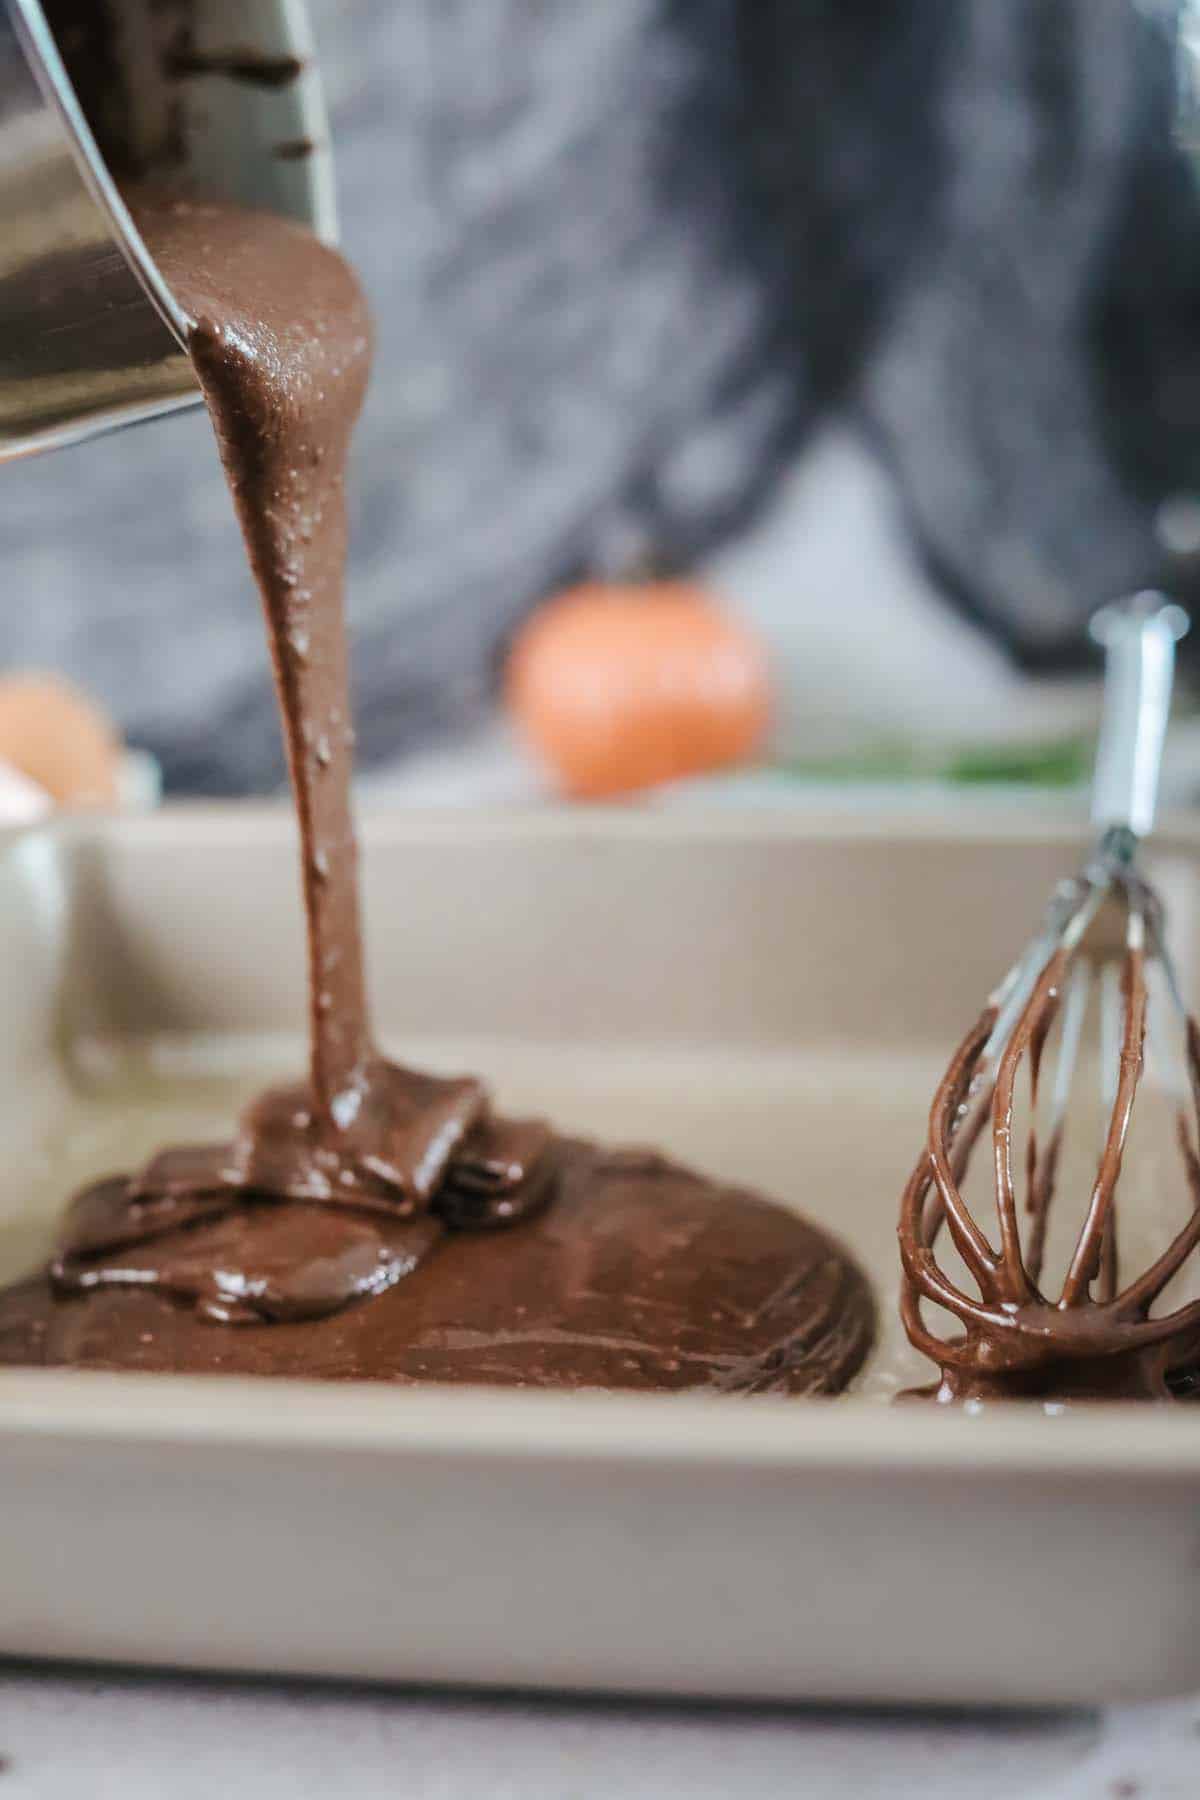
Pour brownie batter into prepared pan.
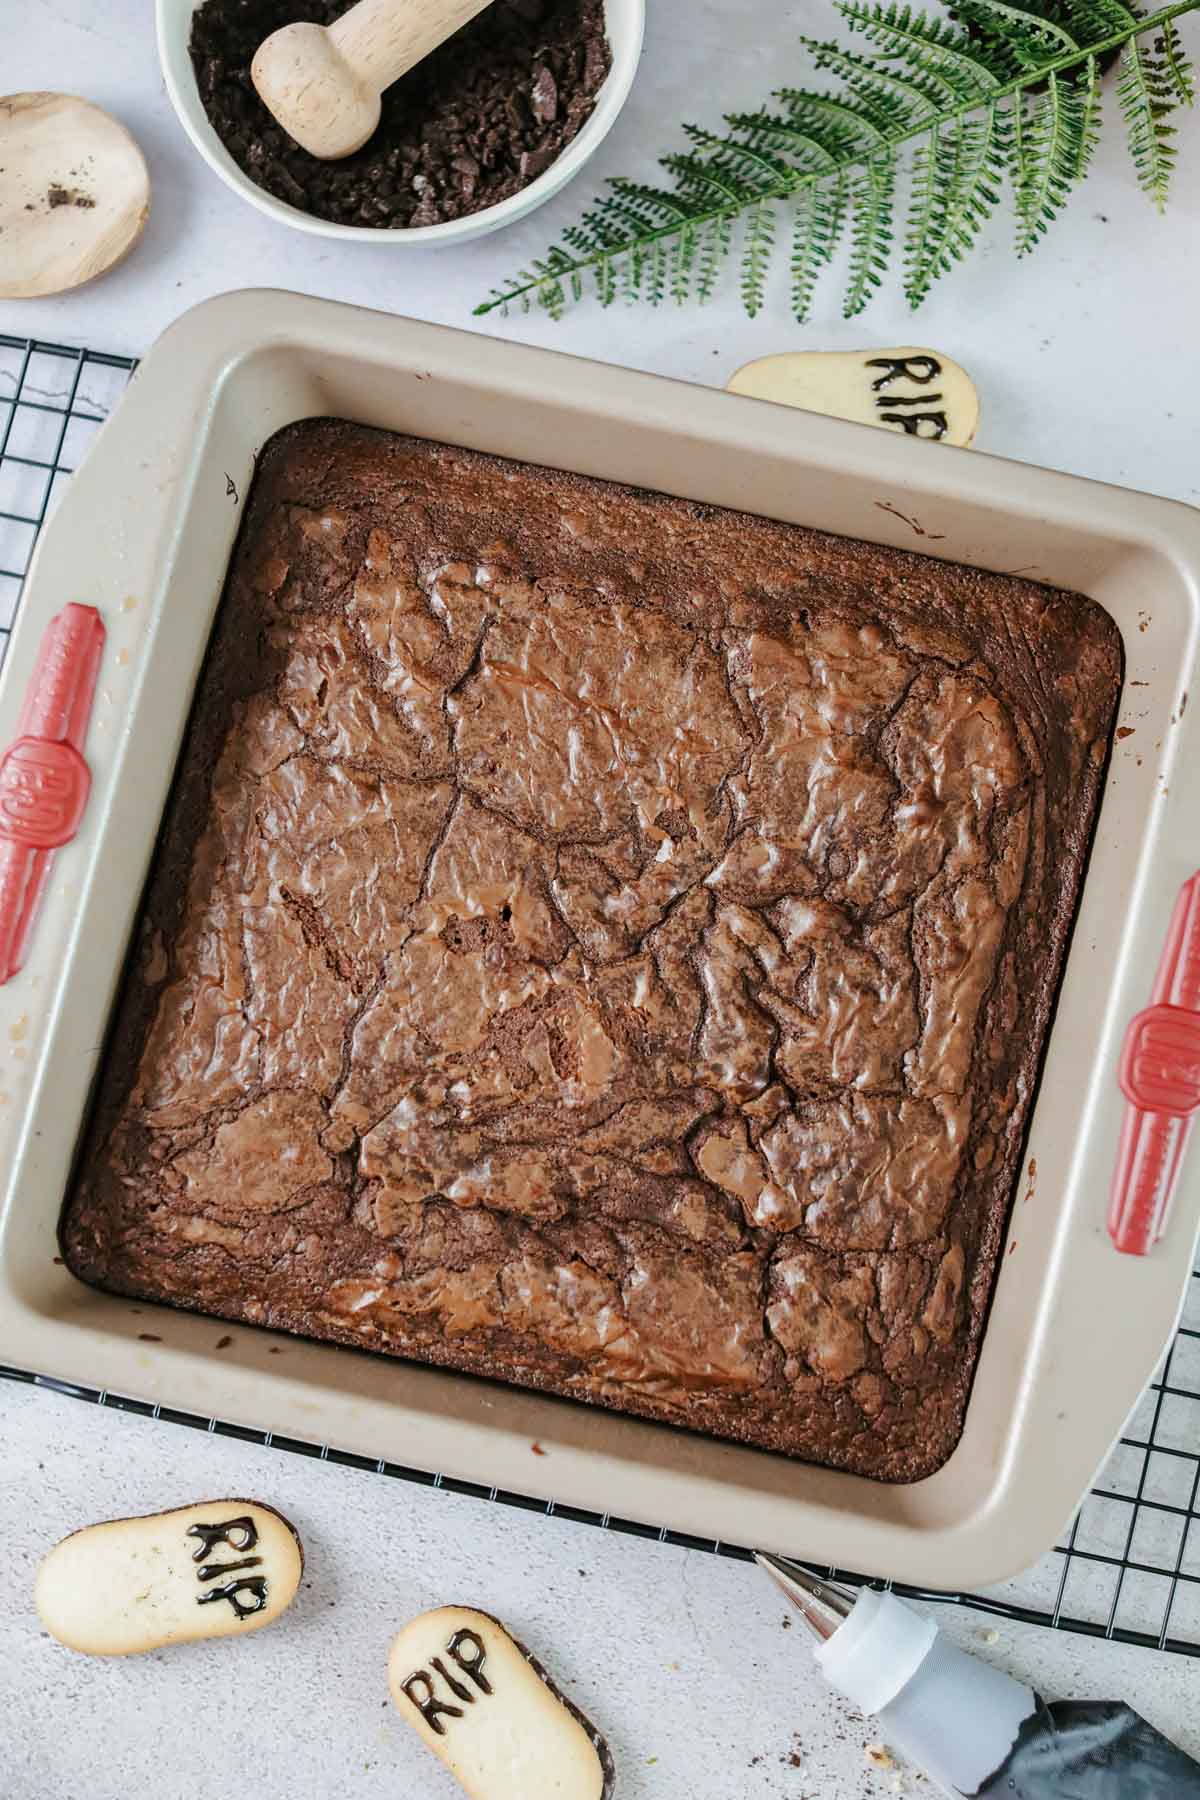
Bake.
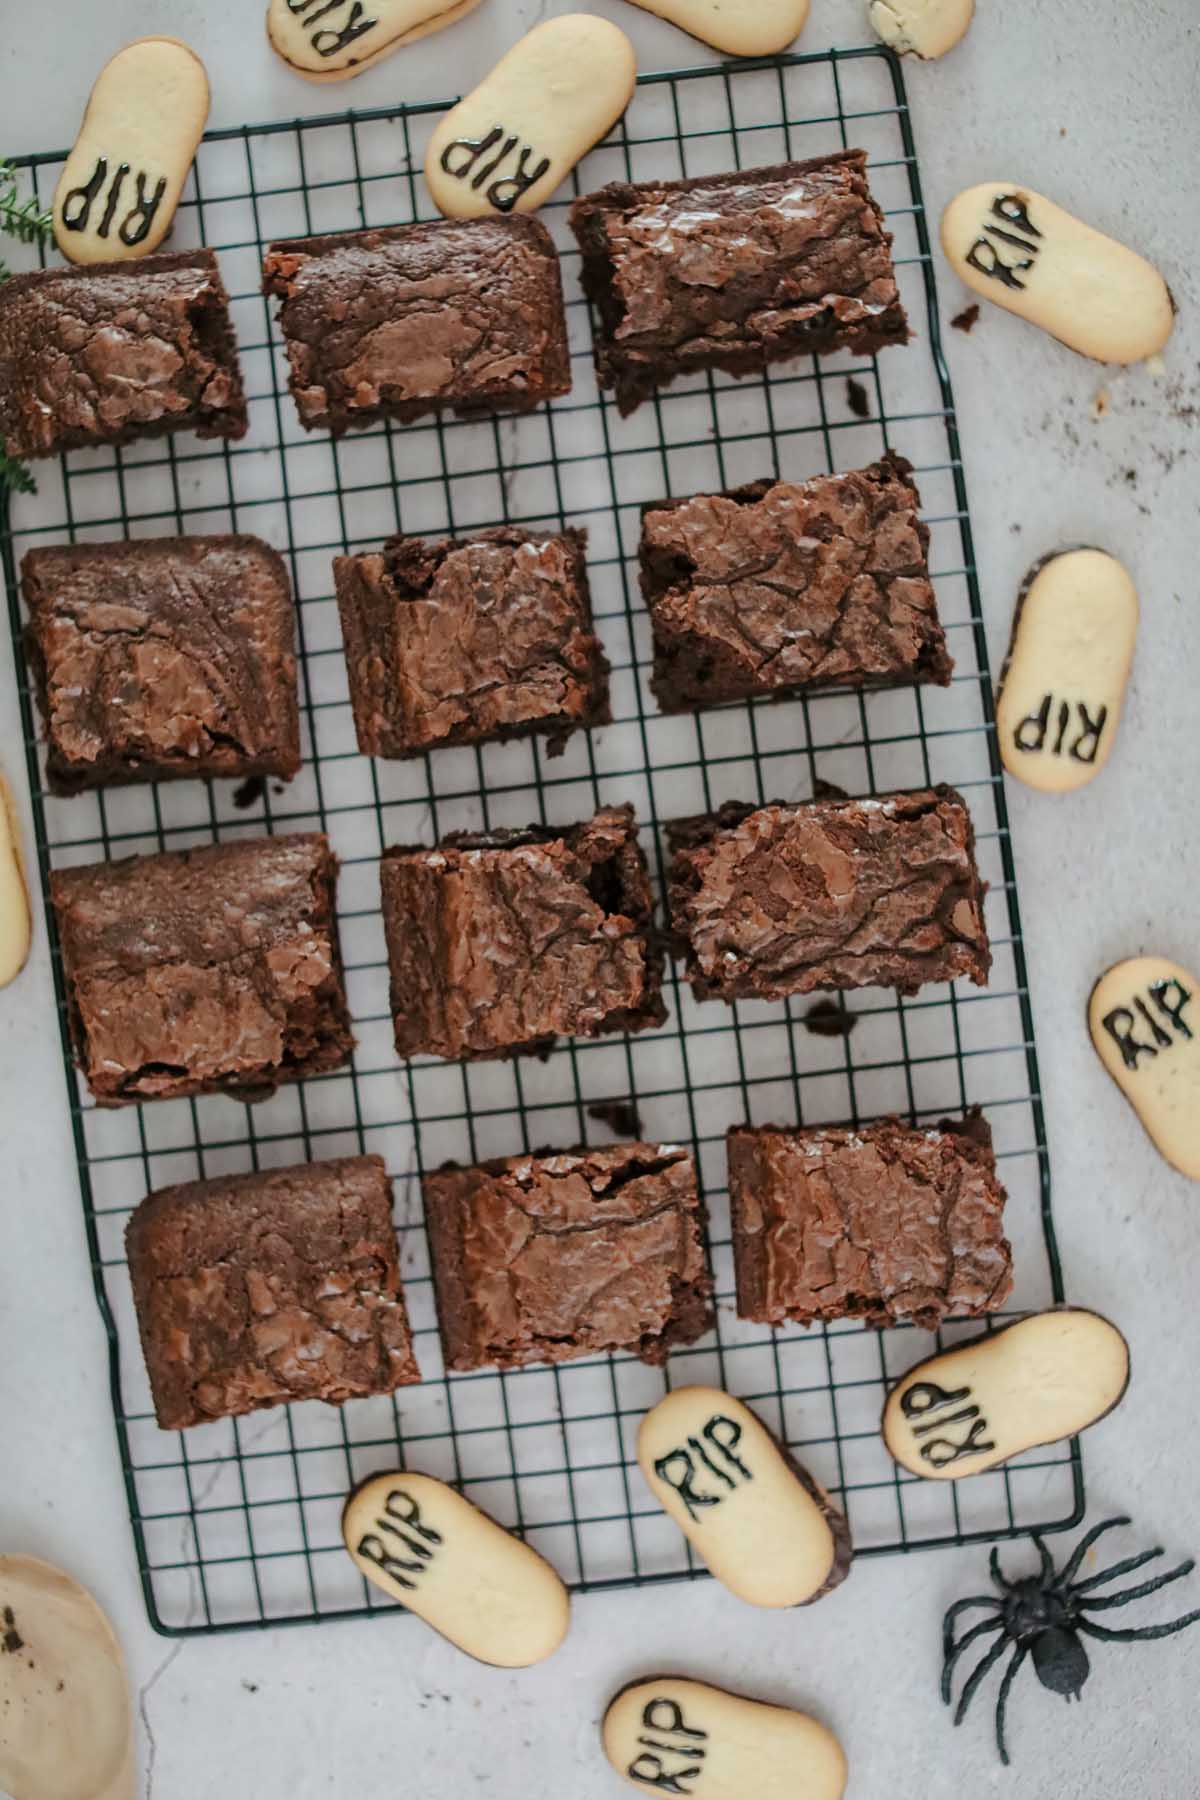
Cut them into 12 equal sized rectangles.

Crush the cookies into a fine crumb.
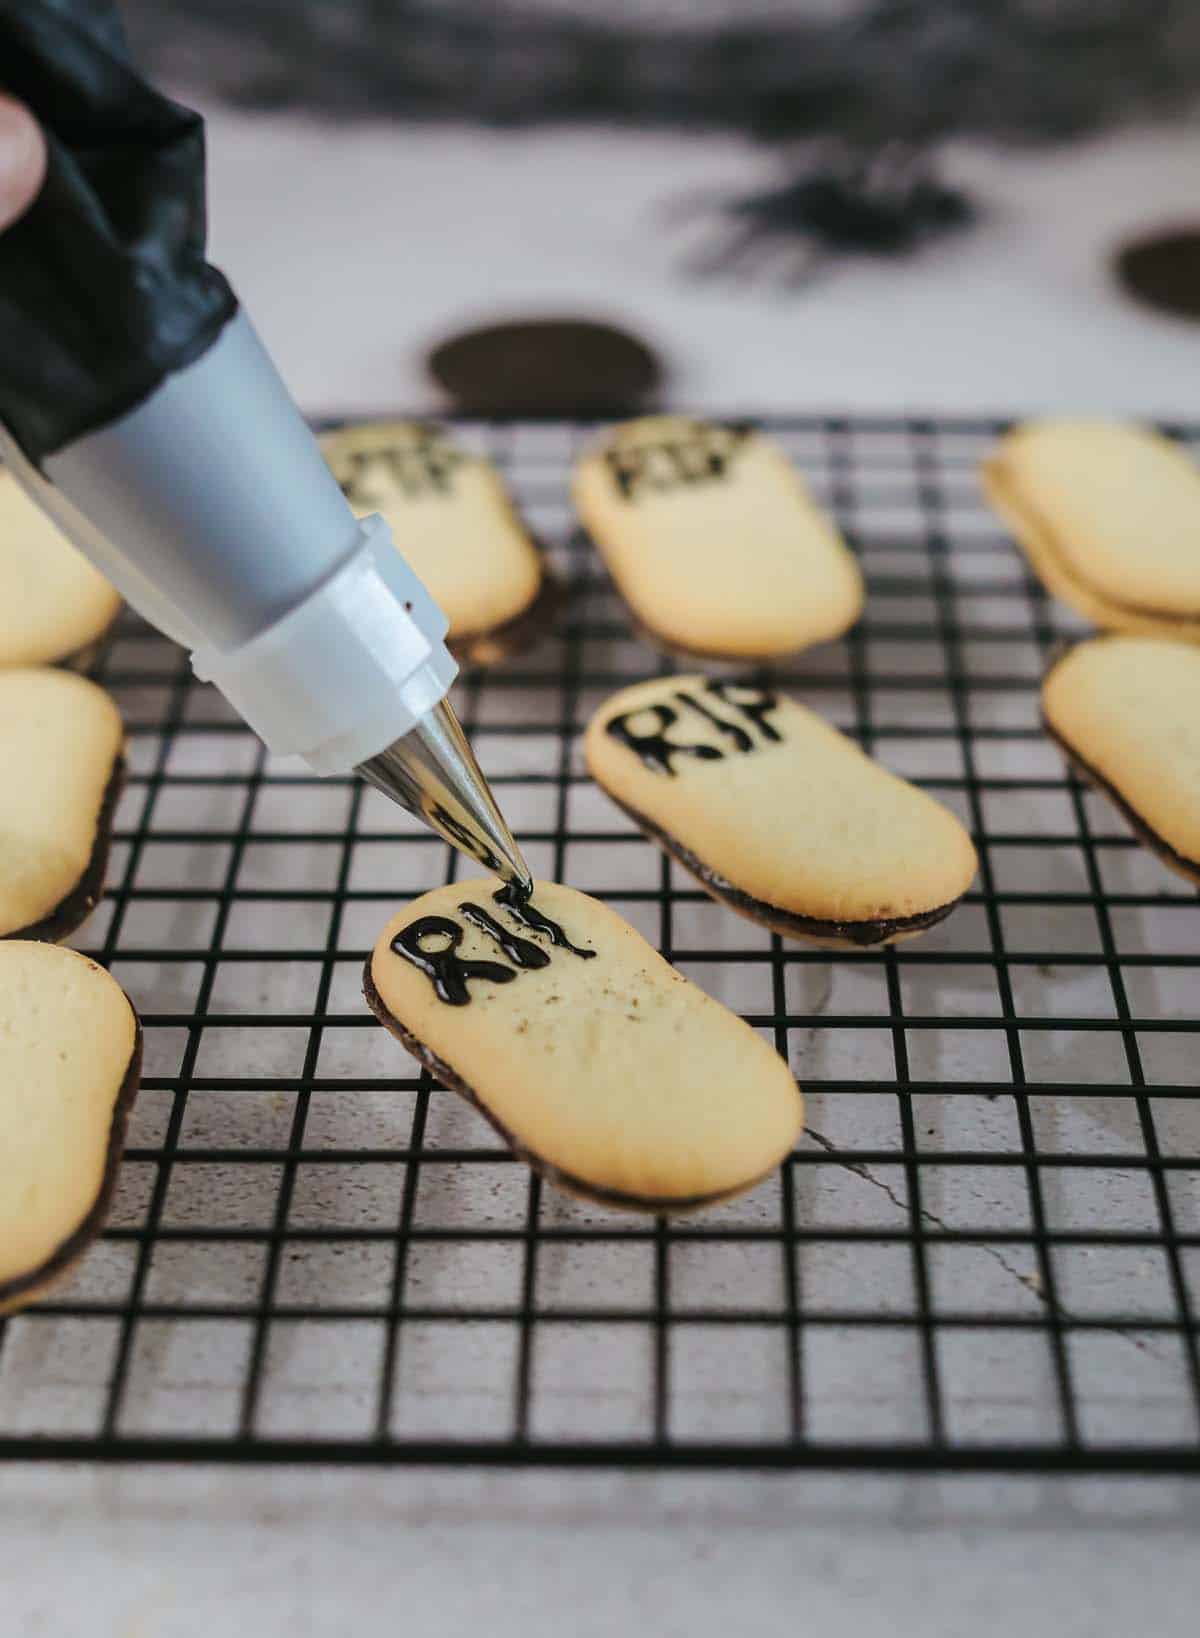
Write RIP on top of each Milano cookie.
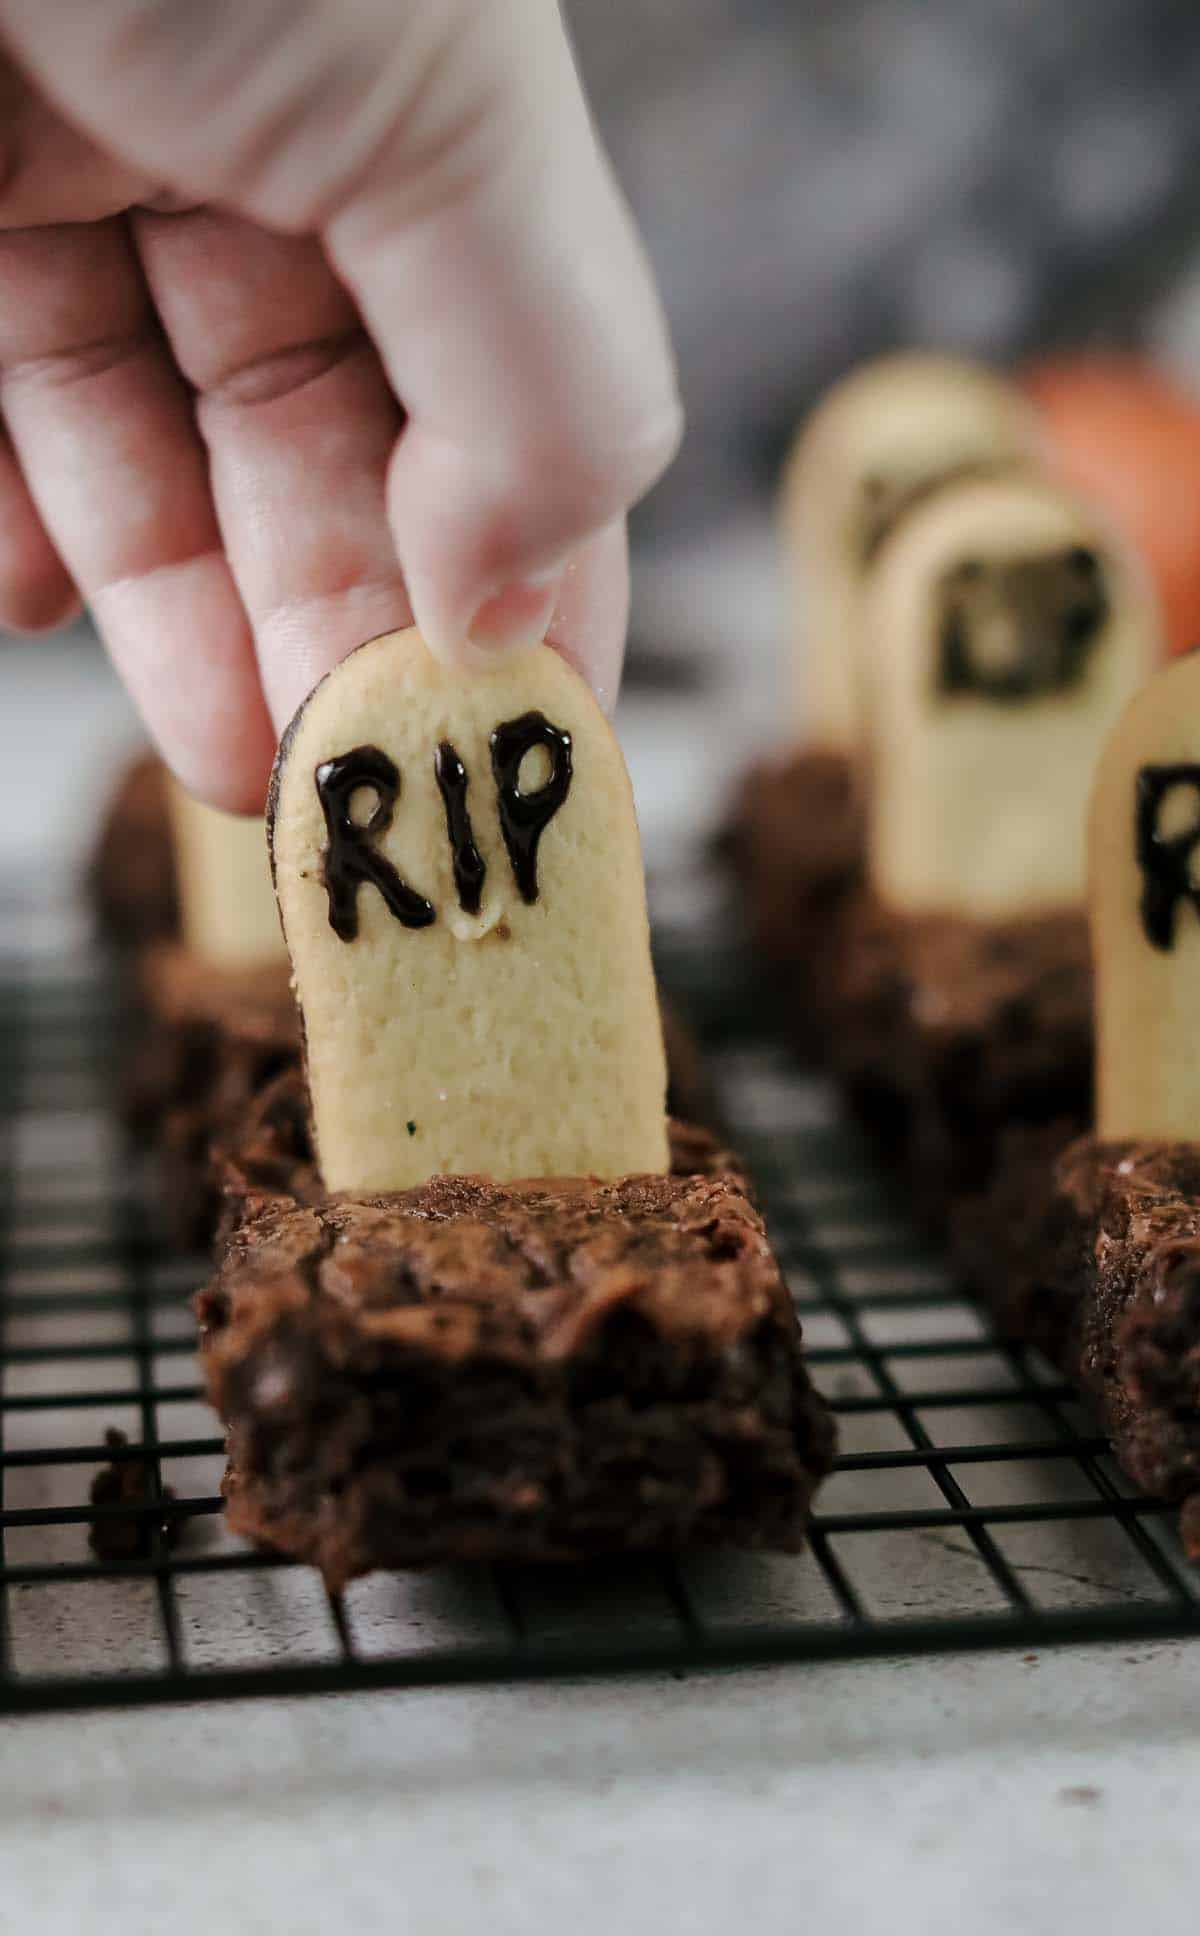
Insert Milano cookies into the brownies.
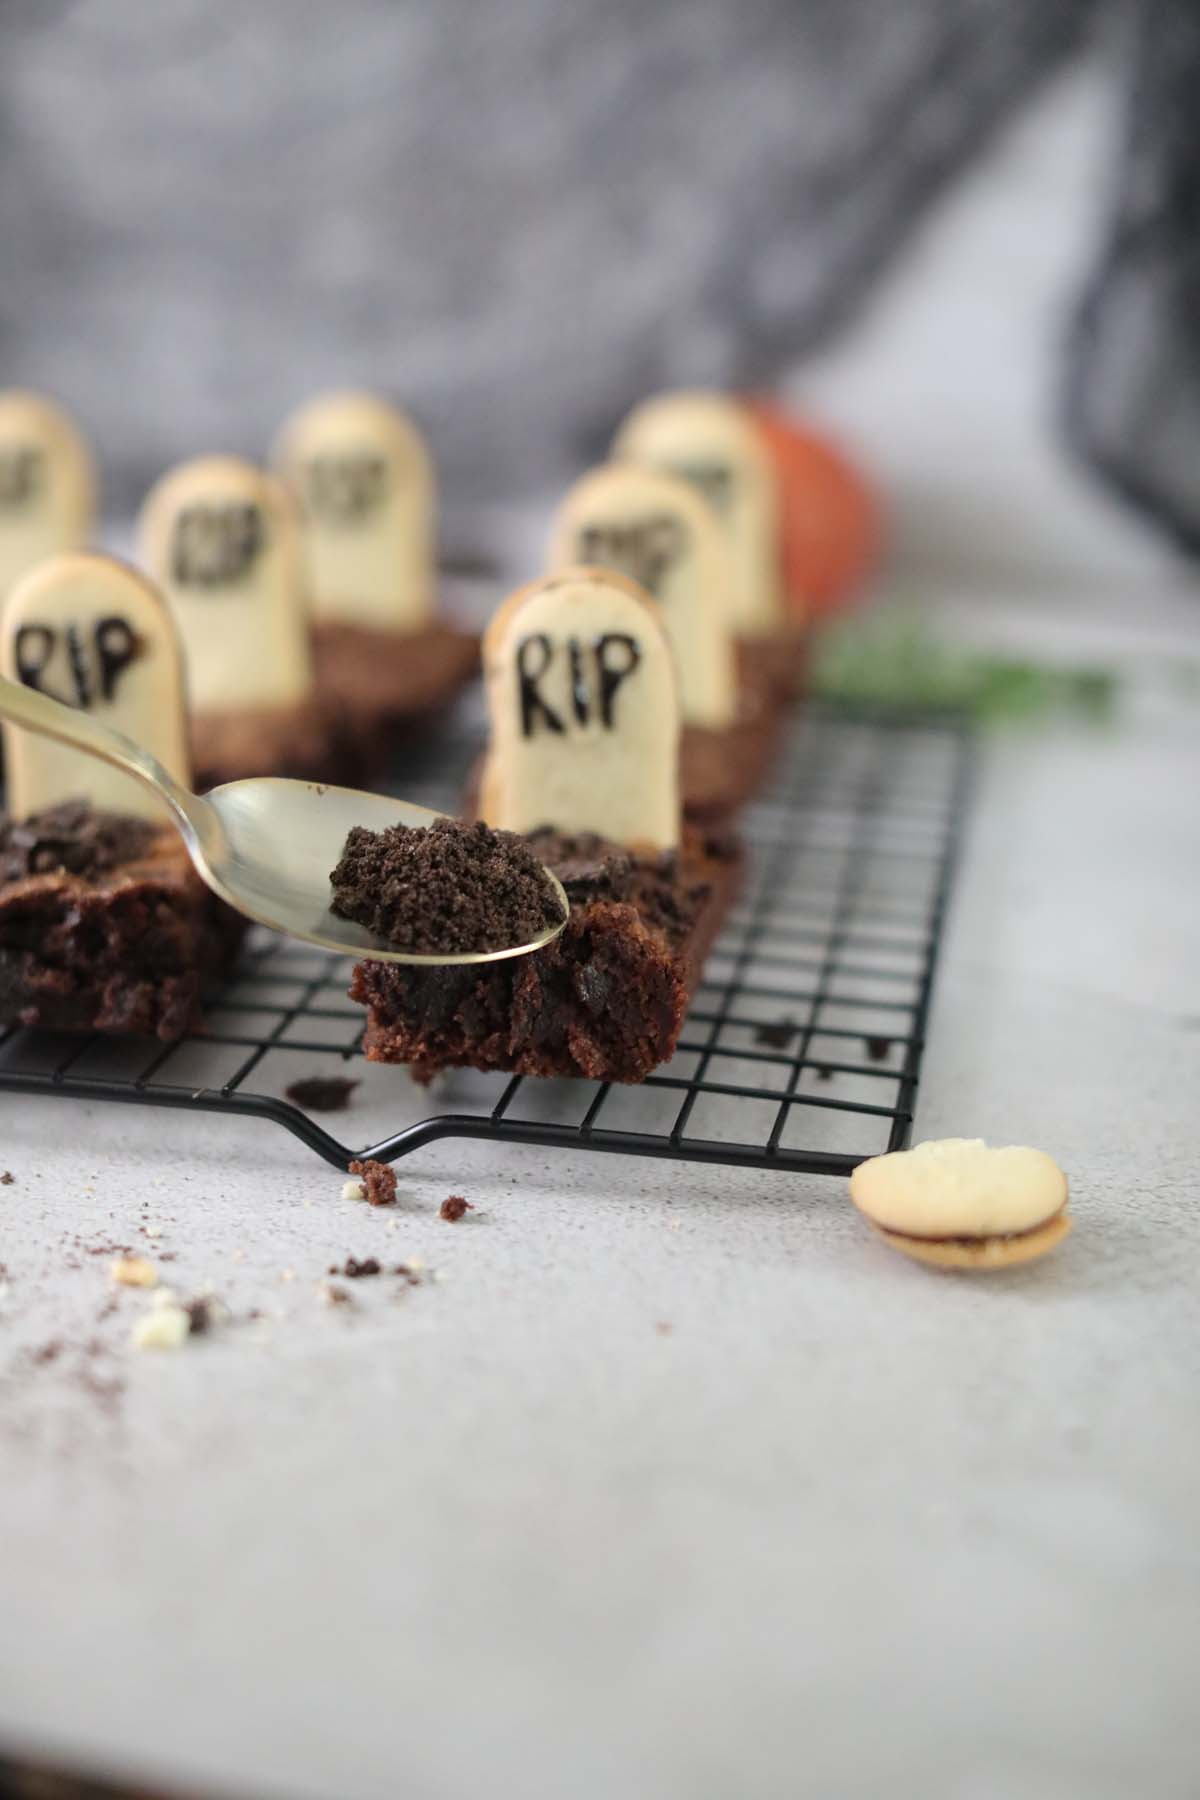
Spread Oreos on each brownie grave.
How To Make Halloween Graveyard Brownies
Step 1. Preparation: Preheat the oven to the temperature specified on the brownie batter box. Prepare brownie batter according to the box instructions. Lightly coat an 8” baking pan with non-stick cooking spray.
Step 2. Baking: Pour the brownie batter into the prepared pan and bake as per the box directions.
Step 3. Cookie tombstones: While the brownies are baking, use black decorating icing/gel to write "RIP" on each Milano cookie. Set aside the decorated Milano cookies.
Step 4. Oreo dirt: Scrape the filling from 5 Oreos, crush the cookies into fine crumbs to use as dirt.
Step 5. Assembly: Allow the brownies to cool, then cut into 12 equal rectangles (4 x 3). Carefully insert each Milano cookie into the top of the brownie as a headstone. Spread a teaspoon of crushed Oreos on each brownie to resemble a pile of dirt.
NOTE: You can print the FULL recipe with all ingredients & detailed instructions below!

Tips
- A few spooky decorations for the headstones besides "RIP" could be "EEK" or "BOO" and mini candy pumpkins, gummy worms, scary bone sprinkles, candy skulls or candy skeletons sitting next to the headstones.
- Use a resealable plastic bag and a rolling pin to make the Oreo crumbs.
- If following a box brownie mix and you decide to use a 13x9-inch pan, the brownies will not be as thick and you may find it difficult to insert the Milano cookies so that they stay upright. If you go this route, break the cookies in half before inserting into the top of the brownies.
- Toss some chocolate chips into the brownie batter for even more chocolate flavor.
Frequently Asked Questions About Spooky Graveyard Brownies
To get clean cuts and the perfect shape, use a sharp knife and wipe it clean between each cut. You can also use a plastic knife if you don't have a sharp one. If you are having trouble getting clean cuts, place the brownies in the freezer for about 15 minutes before cutting.
Yes, you can store them at room temperature for up to 2-3 days in an airtight container.
For longer freshness, refrigerate the brownies in an airtight container. They can last up to a week in the refrigerator.
Yes, you can freeze them. Place the brownies in a single layer on a baking sheet until solid, then transfer to an airtight container or freezer bag. They can be stored in the freezer for up to 2-3 months.
More Fall Recipes You Might Enjoy


If you love this recipe, please leave a comment with a five-star rating — or simply hit the five-star button in the recipe card. Don't forget to signup for my newsletter.

Graveyard Brownies
Equipment
Ingredients
- Prepared brownie batter boxed
- 12 Milano cookies
- Black decorating icing/gel
- 5 Oreos filling removed
Instructions
- Pre-heat oven to temperature indicated on brownie batter box.
- Prepare the brownie batter according to the directions on the box.
- Lightly coat an 8” baking pan with the non-stick cooking spray.
- Pour brownie batter into the prepared pan, bake according to box directions.
- While brownies are baking, use the black decorating icing/gel to write RIP on the top of each Milano cookie. Set aside.
- Scrape the filling from the Oreos and place the chocolate pieces into a small bowl, crush the cookies into a fine crumb to use for dirt on the brownie graves.
- Allow brownies to cool and cut them into 12 equal sized rectangles (4 x 3).
- Carefully insert each Milano cookie into the top of the brownie, as if it were a headstone.
- Using a small spoon, spread about a teaspoon worth of the crushed Oreos on each brownie grave to resemble a pile of dirt. Serve and enjoy!
Notes
- A few spooky decorations for the headstones besides "RIP" could be "EEK" or "BOO" and mini candy pumpkins, gummy worms, scary bone sprinkles, candy skulls or candy skeletons sitting next to the headstones.
- Use a resealable plastic bag and a rolling pin to make the Oreo crumbs.
- If following a box brownie mix and you decide to use a 13x9-inch pan, the brownies will not be as thick and you may find it difficult to insert the Milano cookies so that they stay upright. If you go this route, break the cookies in half before inserting into the top of the brownies.
- Toss some chocolate chips into the brownie batter for even more chocolate flavor.
- Storing: You can store them at room temperature for up to 2-3 days in an airtight container. They can last up to a week in the refrigerator.
- Freezing: Place the brownies in a single layer on a baking sheet until solid, then transfer to an airtight container or freezer bag. They can be stored in the freezer for up to 2-3 months.
Nutrition
All nutritional information is based on third-party calculations and should be considered estimates. Actual nutritional content will vary with brands used, measuring methods, portion sizes and more.


Leave a Reply