
Get in the Halloween spirit with these Halloween Cheesecake Brownies! The fudgy brownie layer paired with the creamy cheesecake layer is the perfect delicious treat with traditional Halloween colors.
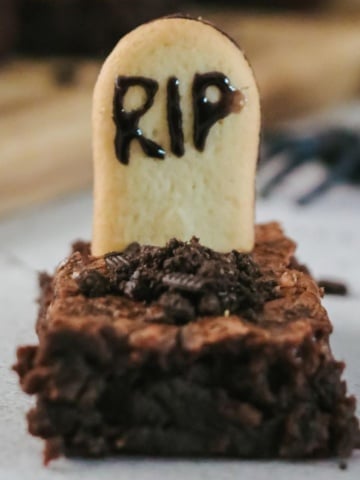
Try my Halloween Rice Krispies Treats and Graveyard Brownies for more Halloween treats!

Jump to:
These festive halloween brownies are made the easy way with the brownie base being made with a box of brownie mix. The bright orange cheesecake topping make these brownies the best Halloween treats for a Halloween party.
This Halloween brownie recipe is the perfect blend of two classic desserts - the fudgy brownies and the colorful cheesecake swirl.

Why You'll Love This Recipe
This spooky treat can be easily customized to your liking. You can use black food coloring to draw a spider web on top or a ghost for ghost cheesecake brownies.
These halloween cream cheese brownies are the perfect Halloween brownies recipe! Enjoy spooky season in style!
Ingredients You Need

- Box of fudge brownie mix + ingredients on the back (water, oil, eggs): You'll need all of these ingredients to make the brownies.
- Cream cheese: Adds a rich and creamy texture to the cheesecake layer.
- Sugar: Sweetens both the cream cheese layer.
- Egg: Provides structure and moisture.
- Vanilla extract: Enhances the overall flavor.
- Orange gel food coloring: Adds a festive and Halloween orange color to the cheesecake layer.
Step By Step Photos

Add brownie mix to a mixing bowl.

Combine with eggs, oil and water.

Cream cream cheese and sugar.

Add egg and vanilla. Mix

Add drops of orange gel food coloring.

Pour batter in prepared 9x13 inch pan.

Drop cheesecake mixture by spoonfuls.

Swirl the cheesecake mixture.
How To Make Cream Cheese Halloween Brownies
Step 1. Preparation: Preheat oven to 350 °F and spray a 9x13 inch size pan with non-stick spray.
Step 2. Brownie mix: Combine fudge brownie mix, water, oil, and eggs in a large bowl. Mix according to box directions. Pour into the prepared pan.
Step 3. Cheesecake mixture: Cream together cream cheese and sugar until fluffy. Add egg and vanilla, mix well. Add orange gel food coloring, adjust for desired color.
Step 4. Assembly: Drop orange cheesecake mixture over the top of the brownie layer by spoonfuls. Use a toothpick to swirl brownie and cheesecake batter together.
Step 5. Baking: Bake for 50-55 minutes until a toothpick comes out clean. Allow brownies to cool in the pan. Cut into squares and enjoy!
NOTE: You can print the FULL recipe with all ingredients & detailed instructions below!

Tips
- Use a hand mixer to cream together the cream cheese and sugar. This will help make the mixture light and fluffy.
- To get that perfect orange color, start with 9-10 drops of orange food coloring. If you want it darker, add more food coloring until desired shade is reached.
- For an extra chocolatey treat, add some chocolate chips to the brownie batter before swirling in the cheesecake mixture.
- For a fun twist, try using a different color of gel. Yellow food coloring would also be cool.
Frequently Asked Questions About Halloween Swirl Cream Cheese Brownies
Some of my favorite toppings for these brownies include candy corn and Halloween sprinkles.
Store the brownies in an airtight container at room temperature for up to 2-3 days.
Yes, refrigeration helps extend their shelf life. Place the brownies in an airtight container and store them in the refrigerator for up to a week.
Absolutely! Freeze the brownies in a single layer until solid, then transfer them to a freezer bag or container. They can be frozen for up to 2-3 months.
More Fall Recipes You Might Enjoy

If you love this recipe, please leave a comment with a five-star rating — or simply hit the five-star button in the recipe card. Don't forget to signup for my newsletter.

Halloween Cheesecake Brownies
Ingredients
- 18.3 ounce box of fudge brownie mix + ingredients on the back water, oil, eggs
- 8 ounces cream cheese
- ⅓ cup sugar
- 1 egg
- ½ teaspoon vanilla
- Orange gel food coloring
Instructions
- Preheat oven to 350°F and spray a 9x13 inch size pan with non-stick spray.
- Combine fudge brownie mix, water, oil, and eggs in a large bowl. Mix according to box directions. Pour into the prepared pan.
- Cream together cream cheese and sugar until fluffy. Add egg and vanilla, mix well. Add orange gel food coloring, adjust for desired color.
- Drop orange cheesecake mixture over the top of the brownie layer by spoonfuls. Use a toothpick to swirl brownie and cheesecake batter together.
- Bake for 50-55 minutes until a toothpick comes out clean. Allow brownies to cool in the pan. Cut into squares and enjoy!
Notes
- Use a hand mixer to cream together the cream cheese and sugar. This will help make the mixture light and fluffy.
- To get that perfect orange color, start with 9-10 drops of orange food coloring. If you want it darker, add more food coloring until desired shade is reached.
- For an extra chocolatey treat, add some chocolate chips to the brownie batter before swirling in the cheesecake mixture.
- For a fun twist, try using a different color of gel. Yellow food coloring would also be cool.
- Storing: Store the brownies in an airtight container at room temperature for up to 2-3 days. Refrigeration helps extend their shelf life. Place the brownies in an airtight container and store them in the refrigerator for up to a week.
- Freezing: Freeze the brownies in a single layer until solid, then transfer them to a freezer bag or container. They can be frozen for up to 2-3 months.
Nutrition
All nutritional information is based on third-party calculations and should be considered estimates. Actual nutritional content will vary with brands used, measuring methods, portion sizes and more.
Leave a Reply